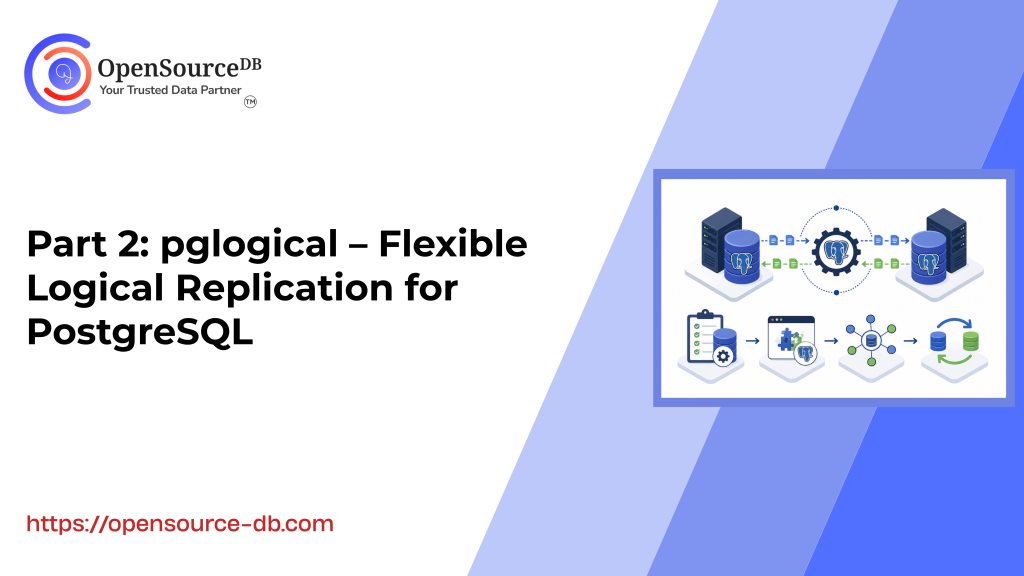
PostgreSQL 16

PostgreSQL Partitioning Made Easy: Features, Benefits, and Tips

Partitioning is a powerful database technique designed to improve large table’s performance, scalability, and manageability. By dividing a large table into smaller, more manageable pieces, partitioning allows for more efficient data access and maintenance. In PostgreSQL, one of the leading open-source database systems, partitioning plays a crucial role in optimizing the handling of large datasets.

This guide will walk you through the fundamentals of partitioning in PostgreSQL, highlighting its key advantages and exploring the different partitioning strategies available. By the end, you’ll have a solid understanding of how to choose the right partitioning approach to best meet your specific needs, whether you’re managing vast amounts of data or looking to optimize your database’s performance.

What Is Partitioning?

Partitioning allows you to split a database table into multiple segments based on conditions you define. Selecting appropriate criteria is crucial, as it should align with the characteristics of your data and its intended usage. Although partitioned tables are physically stored in separate pieces, they appear unified to applications, allowing seamless access and operations.

Why Use Partitioning?

Partitioning significantly improves database performance by optimizing data access speed while streamlining database management and maintenance processes.

1. Boost Query Performance

Partitioning optimizes data access and processing through more efficient resource usage:

Focused Data Access:

By applying filters in your queries, PostgreSQL limits the search to relevant partitions. This reduces disk operations and uses memory caching for frequently accessed data.

Enhanced Scalability in PostgreSQL 12+:

Earlier PostgreSQL versions suggested keeping partitions to about 100 for speed. Since version 12, improvements have enabled the efficient management of thousands of partitions.

2. Simplify Maintenance

Partitioning makes routine tasks like adding, modifying, or removing data easier and faster:

Segmented Data Management:

Consider a system that keeps five years of sales records, organized by month. When a new month starts, you can add a new partition and remove the outdated partitions from five years ago.

Faster Deletions:

Dropping or truncating entire partitions is much quicker than deleting rows one by one. These methods also reduce the load on maintenance processes like VACUUM.

Partitioning Options in PostgreSQL

PostgreSQL supports several partitioning strategies, allowing you to organize data according to your operational requirements.

1. Range-Based Partitioning

Description: Divides data into segments based on specified ranges.

Best For: Time-series data, such as logs or historical records.
Examples: Data grouped by date, event date, etc.

postgres=# CREATE TABLE sales (sale_id SERIAL,sale_date DATE NOT NULL,amount NUMERIC

) PARTITION BY RANGE (sale_date);
CREATE TABLE sales_jan2024 PARTITION OF sales FOR VALUES FROM ('2024-01-01') TO ('2024-02-01');

CREATE TABLE sales_feb2024 PARTITION OF sales FOR VALUES FROM ('2024-02-01') TO ('2024-03-01');

postgres=# INSERT INTO sales (sale_date, amount) VALUES

('2024-01-15', 150.00),

('2024-02-10', 200.00);

INSERT 0 2

postgres=# SELECT * FROM sales WHERE sale_date = '2024-01-15';

 sale_id | sale_date  | amount 

---------+------------+--------

       1 | 2024-01-15 | 150.00

(1 row)

2. List-Based Partitioning

Description: Organizes data into partitions based on specific, predefined values.

Best For: Grouping categorical data, like regions or departments.

Examples: Splitting records by geographic area or job title.

postgres=# CREATE TABLE customers (customer_id SERIAL,region TEXT NOT NULL,name TEXT

) PARTITION BY LIST (region);

CREATE TABLE customers_us PARTITION OF customers FOR VALUES IN ('US');

CREATE TABLE customers_europe PARTITION OF customers FOR VALUES IN ('Europe');

postgres=# INSERT INTO customers (region, name) VALUES

('US', 'John Doe'),

('Europe', 'Jane Smith');

INSERT 0 2

postgres=# SELECT * FROM customers WHERE region = 'Europe';

 customer_id | region |    name    

-------------+--------+------------

           2 | Europe | Jane Smith

(1 row)

3. Hash-Based Partitioning

Description: Distributes data evenly across partitions using a hash function.

Best For: Scenarios where balanced distribution is crucial to prevent performance bottlenecks.

postgres=# CREATE TABLE user_sessions (session_id SERIAL,user_id INT NOT NULL,session_data TEXT) PARTITION BY HASH (user_id);

CREATE TABLE user_sessions_part1 PARTITION OF user_sessions

FOR VALUES WITH (MODULUS 4, REMAINDER 0);

CREATE TABLE user_sessions_part2 PARTITION OF user_sessions

FOR VALUES WITH (MODULUS 4, REMAINDER 1);

postgres=# INSERT INTO user_sessions (user_id, session_data) VALUES

(1, 'Session 1 Data'),

(5, 'Session 5 Data');

INSERT 0 2

postgres=# SELECT * FROM user_sessions WHERE user_id = 1;

 session_id | user_id |  session_data  

------------+---------+----------------

          1 |       1 | Session 1 Data

(1 row)

3. Composite Partitioning

For more intricate setups, you can create subpartitions within primary partitions, a method called composite or hierarchical partitioning.

For instance, you could divide a sales table first by month and then further by product category. This structure improves query performance, especially for operations requiring specific subsets of data, like retrieving sales for a specific product in a particular month.

PostgreSQL composite partitions can be created up to N levels. Partition methods LIST-LIST, LIST-RANGE, LIST-HASH, RANGE-RANGE, RANGE-LIST, RANGE-HASH, HASH-HASH, HASH-LIST, and HASH-RANGE can be created in PostgreSQL declarative partitioning.

In the case of HASH-LIST, HASH-RANGE, and HASH-HASH composite partitions, users need to make sure all partitions are present at the subpartition level as HASH can direct values at any partition based on the hash value.

postgres=# CREATE TABLE product_sales (sale_id SERIAL,sale_date DATE NOT NULL,category TEXT,amount NUMERIC) PARTITION BY RANGE (sale_date);

CREATE TABLE product_sales_2024 PARTITION OF product_sales

FOR VALUES FROM ('2024-01-01') TO ('2025-01-01')

PARTITION BY LIST (category);

CREATE TABLE product_sales_2024_electronics PARTITION OF product_sales_2024

FOR VALUES IN ('Electronics');

CREATE TABLE product_sales_2024_clothing PARTITION OF product_sales_2024

FOR VALUES IN ('Clothing');

postgres=# INSERT INTO product_sales (sale_date, category, amount) VALUES

('2024-03-15', 'Electronics', 300.00),

('2024-03-16', 'Clothing', 150.00);

INSERT 0 2

postgres=# SELECT * FROM product_sales WHERE category = 'Electronics';

 sale_id | sale_date  |  category   | amount 

---------+------------+-------------+--------

       1 | 2024-03-15 | Electronics | 300.00

(1 row)

Limitations of PostgreSQL Partitions

PostgreSQL partitions have a few limitations:

Foreign key constraints involving partitioned tables are not supported. This includes foreign keys that reference a partitioned table and those where a partitioned table references another table, due to the lack of primary key support on partitioned tables.

Row-level triggers need to be set up individually for each partition rather than on the partitioned table as a whole.

Range partitions do not allow NULL values.
Solution/workaround for foreign key reference in the partition table
Instead of referencing the foreign key to the partition table, we can reference in a foreign table

Example: let’s say the event table is partitioned, you cannot reference on event table

ALTER TABLE ONLY public.event
    ADD CONSTRAINT "FK_1" FOREIGN KEY (type_id) REFERENCES public.event_type(id);

you can reference it to the event_type table like this

ALTER TABLE ONLY public.event_type
    ADD CONSTRAINT "FK_1" FOREIGN KEY (id) REFERENCES public.event(type_id);

TL;DL
a) What are the main types of partitioning in PostgreSQL?
The main types are range, list, and hash partitioning.
b) Can I combine multiple partitioning strategies?
Yes, you can use subpartitioning to combine strategies, such as range and list.
c) How does partitioning improve query performance?
Partitioning reduces the amount of data scanned by focusing on relevant partitions, speeding up query execution.
d) Are there any limitations to PostgreSQL partitioning?
Limitations include the need for careful planning and potential overhead in managing partitions.
e) What tools can help with managing partitions?
Tools like pg_partman can simplify partition creation, management, and maintenance.

Conclusion: 
Partitioning in PostgreSQL significantly enhances database performance, scalability, and manageability by dividing large tables into smaller, more efficient segments. It boosts query performance by focusing on data access and optimizing disk usage, while also simplifying maintenance tasks like adding, modifying, or removing data. PostgreSQL offers various partitioning strategies—range, list, hash, and composite partitioning—each catering to specific data types and operational needs. Organizations can streamline their database management and improve overall system performance by choosing the appropriate partitioning method.

Comparing Ora2Pg vs CYBERTEC Migrator: Which PostgreSQL Migration Tool is Right for You?

Introduction:

Migrating from Oracle to PostgreSQL is a critical step for many organizations looking to embrace open-source technologies, reduce costs, and gain greater flexibility. However, the path to a seamless migration can be challenging, often hinging on the right tools and strategies. In this blog, I share my learnings from comparing two popular tools – Ora2Pg and CYBERTEC Migrator. Each brings unique strengths to the table, catering to different aspects of migration workflows. Whether you’re evaluating these tools for your next migration project or seeking insights into the nuances of Oracle-to-PostgreSQL migration, this post provides a practical perspective based on hands-on experience. Let’s dive in to uncover how these tools measure up and which might be the best fit for your needs.

Table of Contents

  1. What is Ora2Pg?
  2. What is CYBERTEC Migrator?
  3. Features Comparison

3.1 Migration Process
3.2 Schema Conversion
3.3 Data Migration

  1. Ease of Use
  2. Performance and Scalability
  3. Support and Documentation
  4. Cost Comparison
  5. Conclusion

1. What is Ora2Pg?

Ora2Pg is an open-source tool designed to migrate Oracle databases to PostgreSQL. It automates the migration process, including schema conversion, data migration, and the migration of stored procedures, functions, and triggers. The tool is widely adopted for Oracle to PostgreSQL migrations due to its flexibility, comprehensive features, and robust community support.

Key Features:

  • Converts Oracle schemas (tables, indexes, constraints) to PostgreSQL
  • Migrates data from Oracle to PostgreSQL
  • Supports migration of stored procedures, triggers, and views
  • Offers detailed reports on migration progress
  • It can be used as a command-line tool, ideal for scripting and automation

2. What is CYBERTEC Migrator?

CYBERTEC Migrator is a commercial solution for migrating Oracle databases to PostgreSQL, developed by CYBERTEC, a leading provider of PostgreSQL services. CYBERTEC Migrator is designed to be user-friendly and highly customizable, targeting businesses that need a smooth, reliable migration from Oracle to PostgreSQL with professional support.

Key Features:

  • User-friendly graphical interface
  • Full migration support (schema, data, and objects like procedures and triggers)
  • Migration of complex Oracle PL/SQL code to PostgreSQL PL/pgSQL
  • Direct data transfer (no intermediate format needed)
  • Enterprise-level support and consultancy

3. Features Comparison

3.1 Migration Process

Ora2Pg:

Schema Migration: Ora2Pg excels in converting Oracle database schemas to PostgreSQL. It converts tables, indexes, constraints, views, and more, but may require some manual adjustments for complex Oracle features.

Data Migration: Ora2Pg can export data in batches, reducing downtime during migration. However, it may not be as efficient for very large datasets.

CYBERTEC Migrator:
Schema Migration: CYBERTEC Migrator is highly efficient with schema conversion, often requiring fewer manual adjustments than Ora2Pg. It is designed to handle more complex Oracle features.

Data Migration: Known for its streamlined data migration process, CYBERTEC Migrator supports high-volume data transfers with minimal performance impact.

3.2 Schema Conversion

Ora2Pg:

Ora2Pg can automatically convert most Oracle database objects, including tables, views, indexes, and sequences. However, complex Oracle features (like certain datatypes or partitioning) may need to be manually adjusted after conversion.

CYBERTEC Migrator:

CYBERTEC Migrator provides a robust solution for schema conversion, including support for complex Oracle-specific features. It handles complex data types and large schemas more efficiently.

3.3 Data Migration

Ora2Pg:

Ora2Pg supports different methods of data export, such as CSV or direct data copying. It is effective for small to medium-sized databases, though large datasets might cause performance bottlenecks.

CYBERTEC Migrator:

CYBERTEC Migrator uses a direct data transfer approach, making it highly efficient and reliable for large-scale migrations.

4. Ease of Use

Ora2Pg:

Being a command-line tool, Ora2Pg may require more technical knowledge to use effectively. It is perfect for developers and system administrators comfortable with scripting and command-line operations.

CYBERTEC Migrator:

CYBERTEC Migrator has a graphical interface, making it much easier to use for those who prefer not to work in the command line. It is also more user-friendly for non-technical users and offers a more guided migration experience.

5. Performance and Scalability

Ora2Pg:

Ora2Pg is effective for medium-scale migrations, but performance can degrade for very large Oracle databases. However, its ability to work in batches and configure migration settings helps optimize performance.

CYBERTEC Migrator:
CYBERTEC Migrator is known for handling larger databases more efficiently. It uses optimized algorithms for direct data transfer, reducing the migration time and supporting enterprise-level scalability.

6. Support and Documentation

Ora2Pg:

Ora2Pg benefits from strong community support and comprehensive online documentation. Since it is open-source, users can also contribute to its improvement.
However, support can be slower since it’s community-driven.

CYBERTEC Migrator:

As a commercial product, CYBERTEC Migrator comes with professional support from CYBERTEC. This includes timely troubleshooting, consultancy, and access to enterprise-level documentation.
Users can access training and resources through CYBERTEC’s services, which may be advantageous for complex migrations.

7. Cost Comparison

Ora2Pg:

Cost: Free and open-source.

Best for: Organizations with tight budgets and teams that can handle more technical setups.

CYBERTEC Migrator:

Cost: Commercial product, pricing varies based on the scale of migration and required services.

Best for: Enterprises needing a more polished and supported solution with advanced features.

Detailed Comparison of Features

FeatureOra2PGCYBERTEC Migrator
LicenseOpen-sourceCommercial (Free version available)
Schema ConversionFully automatedFully automated
Data MigrationFully supportedFully supported
PL/SQL to PL/pgSQL ConversionAutomated, but with limitationsMore accurate and polished translation
Ease of UseRequires more technical expertiseUser-friendly, minimal configuration
CustomizationHighly customizable via configLess customizable, more “out-of-the-box”
PerformanceGood for small to medium migrationsOptimized for larger migrations
SupportCommunity-based24/7 commercial support (for paid version)
CostFreeFree for small migrations, Paid for enterprise
Migration SpeedModerateFast, optimized for larger datasets
Complexity HandlingCan be tricky for complex casesHandles complex migrations better

Conclusion:

Choosing the right tool for Oracle-to-PostgreSQL migration is more than just a technical decision—it’s about aligning the capabilities of the tool with your organization’s needs, timelines, and long-term goals. Both Ora2Pg and CYBERTEC Migrator bring powerful features to the table, each excelling in specific areas of the migration journey. Ora2Pg shines with its open-source flexibility and community-driven support, making it a go-to for DIY migrations. On the other hand, CYBERTEC Migrator stands out with its enterprise-grade efficiency, robust automation, and tailored expertise for complex migrations.

Through this comparison, one thing becomes clear: the right choice depends on your project’s complexity, your team’s familiarity with the tools, and your tolerance for manual effort versus automation. Regardless of the tool you choose, the learnings from evaluating these two solutions will empower you to approach migrations with greater confidence and clarity. Remember, a successful migration is not just about tools—it’s about strategy, planning, and the willingness to adapt.

I hope my learnings help you make a well-informed decision and pave the way for a seamless transition to PostgreSQL. If you have questions or insights to share, feel free to drop them in the comments—I’d love to hear from you!

Mastering the pg_settings view in PostgreSQL

Introduction

PostgreSQL, a powerful and highly customizable open-source relational database system, offers a wide range of tools to manage and optimize its configuration. One of the key resources for interacting with PostgreSQL’s settings is the pg_settings system catalog view. This view acts as a central interface for administrators and developers to access and modify database configuration parameters. Unlike the SHOW and SET commands, which allow for basic configuration management, pg_settings provides more granular details, such as the minimum and maximum allowable values for parameters, the source of the current settings, and whether changes require a database restart. This blog will explore the uses of the pg_settings system catalog view for understanding, viewing, and modifying the PostgreSQL configurations effectively.

Uses of pg_settings

pg_settings is ideal when you need:

  • A comprehensive view of current PostgreSQL configuration.
  • Metadata to understand the implications of specific parameters.
  • To troubleshoot or debug configuration issues.
  • To test parameter changes in a live session.
  • Insights into default settings, minimum/maximum values, and change contexts.

Step1: Understanding pg_settings

The pg_settings table provides a structured view of PostgreSQL configuration parameters. Let’s examine an example query:

postgres=# select * from pg_settings;
-[ RECORD 1 ]---+----------------------------------------
name            | allow_in_place_tablespaces
setting         | off
unit            | 
category        | Developer Options
short_desc      | Allows tablespaces directly inside pg_tblspc, for testing.
extra_desc      | 
context         | superuser
vartype         | bool
source          | default
min_val         | 
max_val         | 
enumvals        | 
boot_val        | off
reset_val       | off
sourcefile      | 
sourceline      | 
pending_restart | f

Let’s breakdown the pg_settings’ output

  • name : The name of the configuration parameter.
  • setting : The current value of the parameter.
  • unit : The unit of the setting, if applicable.
  • category : The parameter’s category (e.g., Memory, Developer Options).
  • short_desc : A brief description of what the parameter does.
  • extra_desc : An extended description of the parameter.
  • context : Where and how the parameter can be modified (e.g., superuser, session).
  • vartype : The type of the value (e.g., integer, boolean).
  • source : The origin of the current value.
  • min_val and max_val : The allowed range for the setting, if applicable.
  • boot_val : The value used when PostgreSQL starts up.
  • reset_val : The value that will be used if the parameter is reset.
  • sourcefile and sourceline : The configuration file and line number defining the parameter.
  • pending_restart : Indicates if a restart is pending for the change to take effect.

A few columns that needs to be highlighted are:

CONTEXT: This parameter ascertains whether the parameter value change needs a RESTART or SIGHUP.
UNIT: You may see a difference between the SHOW output and the value seen on the pg_settings.unit – this is because of the measurement units.
SOURCE: As part of our standard database deployments, we follow the best practices of segregating the parameters into:
– parameters that needs restart
– parameters that needs reload
– specific extension related parameters
– custom parameters per instance
This approach helps us to to be more cautious while changing the parameters.

Step 2:Viewing a Specific Parameter

To view the details of a specific configuration parameter, use a SELECT query:

postgres=#  SELECT * FROM pg_settings WHERE name = 'log_statement';
-[ RECORD 1 ]---+------------------------------------
name            | log_statement
setting         | none
unit            | 
category        | Reporting and Logging / What to Log
short_desc      | Sets the type of statements logged.
extra_desc      | 
context         | superuser
vartype         | enum
source          | default
min_val         | 
max_val         | 
enumvals        | {none,ddl,mod,all}
boot_val        | none
reset_val       | none
sourcefile      | 
sourceline      | 
pending_restart | f

This query will return detailed information about the log_statement configuration, including its current value and the possible settings (none, ddl, mod, all).

Step 3:Modifying a Parameter Temporarily

To temporarily change a parameter, use the SET command:

postgres=#  SET log_statement TO mod;
SET

To verify that the change has taken place, run the same query again:

postgres=#  SELECT * FROM pg_settings WHERE name = 'log_statement';
-[ RECORD 1 ]---+------------------------------------
name            | log_statement
setting         | mod
unit            | 
category        | Reporting and Logging / What to Log
short_desc      | Sets the type of statements logged.
extra_desc      | 
context         | superuser
vartype         | enum
source          | session
min_val         | 
max_val         | 
enumvals        | {none,ddl,mod,all}
boot_val        | none
reset_val       | none
sourcefile      | 
sourceline      | 
pending_restart | f

The setting has been updated to mod, and the source column now reflects that the change was made for the current session.

Step 4:Direct Updates in pg_settings

While it might seem intuitive to directly update the pg_settings table, this approach is typically ineffective for permanent changes:

postgres=# UPDATE pg_settings SET setting = 'all' WHERE name = 'log_statement';
 set_config 
------------
 all
(1 row)

UPDATE 0

Verify the change using:

postgres=#  SELECT * FROM pg_settings WHERE name = 'log_statement';
-[ RECORD 1 ]---+------------------------------------
name            | log_statement
setting         | all
unit            | 
category        | Reporting and Logging / What to Log
short_desc      | Sets the type of statements logged.
extra_desc      | 
context         | superuser
vartype         | enum
source          | session
min_val         | 
max_val         | 
enumvals        | {none,ddl,mod,all}
boot_val        | none
reset_val       | none
sourcefile      | 
sourceline      | 
pending_restart | f

This confirms that the setting has been applied for the current session. However, as you will see in the next steps, this change will be lost once the server is restarted.

Step 5: Checking with SHOW Command

To check the current setting of log_statement after making the change and restarting the database server:

postgres=# show log_statement;
 log_statement 
---------------
 none
(1 row)

Notice: Even though you updated the pg_settings view, the setting is still showing as none when queried with SHOW. This is because changes in pg_settings are session-based and temporary, and the underlying configuration hasn’t been permanently updated.

In order to make permanent changes to any database configuration parameter(s), you could either update the postgresql.conf file directly with the appropriate value(s) set against the corresponding parameter(s), or use the Alter System Set … command.

Conclusion

The pg_settings view is a vital resource for PostgreSQL administrators and developers. It provides an in-depth view of the database’s configuration settings, enabling you to optimize performance, diagnose issues, and better understand the system’s behavior. By leveraging pg_settings, you can manage and fine-tune your PostgreSQL instance with enhanced precision and confidence. Furthermore, it empowers you to track and make informed changes to your configuration, ensuring the system operates at peak performance while meeting specific workload requirements. In essence, mastering pg_settings is key to maintaining a robust, efficient, and secure PostgreSQL environment.

Let us know how you handle postgresql.conf parameter changes by commenting below.

Secure and Seamless Distributed PostgreSQL Deployments: My experience at the Hyderabad Postgres Meetup

Last Friday, I had the privilege of attending the Hyderabad PostgreSQL User Group Meetup, a fantastic gathering of PostgreSQL enthusiasts and professionals. One of the highlights of the event was an enlightening session by Lahari Giddi, SDET at pgEdge, on Distributed PostgreSQL Deployments for Air-Gapped Systems.

Lahari’s talk was informative, delving into the critical role PostgreSQL plays in enabling secure and seamless deployments in isolated, high-security environments. The session shed light on innovative approaches and best practices for managing Distributed PostgreSQL deployments in air-gapped systems, a topic of immense relevance for organizations prioritizing data security.

The meetup was a vibrant platform for knowledge sharing, networking, and celebrating the versatility of PostgreSQL. It reaffirmed the power of community-driven learning and the ever-evolving potential of open-source databases.

The Concept of Air-Gapped Systems

Definition: Air gapping is a Security Measure that involves physically isolating a computer or Network and preventing it from making connection to other n/w devices.

The session began by explaining air-gapped systems, a term that immediately caught my attention. These systems are physically isolated from external networks, making them a go-to solution for environments requiring heightened security. For someone like me who works in tech but hadn’t deeply explored this concept, this talk clearly breaks-down physical isolation, data transfer controls, and robust security protocols was just awesome.

From defense systems to secure offline environments, it became evident why air-gapped solutions are essential in our interconnected yet vulnerable world.

Distributed PostgreSQL in Action

The heart of the session focused on Distributed PostgreSQL deployments, a powerful solution to handle large datasets securely, especially in air-gapped systems. Here are its capabilities:

  • Scalability to manage growing workloads
  • High Availability through replication strategies
  • Secure Integration with encryption and manual synchronization

These features resonated deeply, particularly as Lahari emphasized the importance of fault tolerance and offline functionality. It got me thinking: in scenarios like defense, where systems must function without network dependencies, distributed PostgreSQL offers an elegant yet robust solution.

Why pgEdge is a Perfect Fit for Air-Gapped Systems

One standout part of the session was how pgEdge caters specifically to air-gapped systems. Lahari detailed some impressive benefits:

  • End-to-end encryption for data security
  • Seamless offline failovers
  • Streamlined operations via CLI tools

Hearing about its implementation process and watching the demo made me understand the process clearly. The talk demystified it with a 3-step process – upgrading the repository, CLI, and platform components. The demonstration of commands and upgrades from downloading repositories to upgrading components like Spock made it look surprisingly approachable.

What’s Next

I’m going to continue digging into the Air-gapped system setup using the TAR myself and see if I can break it in any way (lol)

Stay tuned for my next blog!

Check out the YouTube video recording of the complete talk presentation here, for your reference : https://youtu.be/z0oTJK-RMTY

Efficient Data Management: Overcoming the Challenges of Large Tables with an Archival Strategy

In today’s data-driven world, businesses rely heavily on the power of databases to store and manage vast amounts of information. However, as data grows, it becomes more challenging to keep systems performant and efficient. One of the key strategies for managing large datasets in databases like PostgreSQL is an effective archival strategy.

Archiving involves the process of moving older, less frequently accessed data from active tables to an archival table which can later moved to more cost-effective, less performance-intensive storage solution if required. Without proper management of large tables, query performance can degrade, backups can become unwieldy, and maintenance tasks can become time-consuming. This is where having a well-defined archival strategy comes into play. Let’s discuss some of the challenges in managing large size tables and importance of having an archival strategy in this blog post.

Challenges of Managing Large Size Tables

Managing large tables in PostgreSQL presents several challenges. Here are some of them,

  1. Query Performance Degradation: As tables grow in size, the time taken to run queries, especially complex ones, increases. Indexes may become less efficient, and queries can lead to significant I/O operations.
  2. Longer Backup and Restore Times: Large tables result in large database backups. Restoring such backups can be a lengthy process, which may disrupt business operations.
  3. Increased Resource Usage: Storing vast amounts of historical data can become costly in terms of high CPU utilization , disk storage.
  4. Maintenance Overhead: Operations like vacuuming, reindexing, or analyzing large tables take longer and may lock the table, affecting other operations.

Importance of Having an Archival Strategy

An archival strategy is essential for several reasons. Here are some of them,

  1. Improved Performance: By archiving old data, we reduce the size of active tables, which leads to faster queries, better use of indexes, and improves overall database performance.
  2. Reduced Costs: Archiving allows you to move data from the active tables, where we can significantly cut operational expenses like computational and storage costs.
  3. Better Backup Management: Smaller active tables make backup and restore operations faster and less resource-intensive.
  4. Regulatory Compliance and Data Retention: In some industries, data retention is a legal requirement. A proper archival strategy ensures compliance with these regulations by safely storing older data in a manner that can be easily retrieved when necessary.

Archival Strategies

In managing large datasets, we have recently worked on two different archival strategies in two different scenarios.

Approach1 : Moving data through insert/delete

Scenerio : Imagine we have a main table called main_table, which contains data that is up to 3 years old. This table has a created_at column, which stores the timestamp of when each record was created. The goal is to keep only the most recent 3 months of data in the main table. Any data older than 3 months should be moved to an archival table called archive_table .
Note: main_table and archive_table must have the same structure/DDL syntax.

In this approach, we implement a procedure that manually moves the old data from main_table to archive_table based on the created_at timestamp. This approach inserts the old data into the archive and then delete it from the main table.

CREATE OR REPLACE PROCEDURE archive_old_data()
LANGUAGE plpgsql AS $$
DECLARE
    --Step1 declare the variables
    date TIMESTAMP := CURRENT_TIMESTAMP;
    rows_to_archive INTEGER;
    rows_archived INTEGER;
    rows_removed INTEGER;
BEGIN
    --Step2 Count the number of rows to archive
    SELECT COUNT(*) INTO rows_to_archive 
    FROM public.main_table 
    WHERE created_at < date - INTERVAL '3 months';
    
    --Step3 If no rows to archive, log and exit
    IF rows_to_archive = 0 THEN
        RAISE NOTICE 'No rows to archive.';
        RETURN;
    END IF;

    --Step4 Insert old transactions into the archive
    INSERT INTO public.archive_table
    SELECT * 
    FROM public.main_table 
    WHERE created_at < date - INTERVAL '3 months';

    --Step5 Count the number of rows inserted into the archive
    GET DIAGNOSTICS rows_archived = ROW_COUNT;

    --Step6 Verify if the number of rows archived matches the count
    IF rows_to_archive <> rows_archived THEN
        RAISE EXCEPTION 'Row count mismatch: expected %, archived %',         rows_to_archive, rows_archived;
    END IF;

    --Step7 Delete archived transactions from the original table
    DELETE FROM public.main_table 
    WHERE created_at < date - INTERVAL '3 months';
    
    --Step8 Count the number of rows inserted into the archive table
    GET DIAGNOSTICS rows_removed = ROW_COUNT;

    RAISE NOTICE '% rows archived and % rows deleted successfully', rows_archived,rows_removed;
END;
$$;

Let’s break-down the above procedure into 8 steps:

  • Step1 Declare Variables: Set up variables to hold the current date and track row counts.
  • Step2 Count Rows to Archive: Count how many rows are older than 3 months in main_table.
  • Step3 Check for Rows to Archive: If there are no rows to archive, exit early.
  • Step4 Insert into Archive Table: Insert rows older than 3 months into archive_table.
  • Step5 Count Inserted Rows: Check how many rows were inserted into archive_table.
  • Step5 Verify Row Count: Ensure the number of rows archived matches what was counted earlier.
  • Step6 Delete Archived Data: Delete the archived rows from main_table.
  • Step7 Count Deleted Rows: Count how many rows were deleted from main_table.
  • Step8 Log Final Result: Output a success message with the counts of archived and deleted rows.

Alter this procedure as per your environment and schedule a cron job using pg_cron extension which will execute daily in the non-business hours so that there will be less impact. If you are new to Postgres, or if you are unfamiliar with pg_cron, check our detailed blog on scheduling a cron job using pg_cron extension : https://opensource-db.com/automating-postgresql-tasks-with-pg_cron/

Approach2: Partitioning with attaching/detaching

Scenerio : Consider a main table named main_table, which stores data up to 2 years old. The table is partitioned monthly by the created_at column, which holds the timestamp for when each record was created. The objective is to ensure that the main_table only retains the most recent 12 months of data, and any data older than 12 months should be moved to an archival table called archive_table, which is also partitioned.
Note: main_table and archive_table must have the same structure / DDL syntax.

In this approach, we detach the partitioned_table older than 12 months from the main_table and attach the same to the archive_table .

#Step1 Creating the partitioned table for 12 months
postgres=# CREATE TABLE public.main_table_2024_12 PARTITION OF public.main_table
    FOR VALUES FROM ('2024-12-01') TO ('2025-01-01');
CREATE TABLE

#Step2 At the end of each month, Detach the partitioned table from the main table.
postgres=# ALTER TABLE public.main_table DETACH PARTITION public.main_table_2024_12;
ALTER TABLE

#Step3 At the end of each month, Attach the partitioned table to the archive table.
postgres=# ALTER TABLE public.archive_table ATTACH PARTITION public.main_table_2024_12 FOR VALUES FROM ('2024-12-01') TO ('2025-01-01');
ALTER TABLE

Let’s break-down the above steps:

  • Step 1: Create a partition for the month wise data (example:(December 2024) within the main_table, ensuring that all data created in that month is handled in its own partition. We have created one for December’24 , create one partition for the each upcoming month accordingly.
  • Step 2: At the end of the month, Detach the created partition (main_table_2024_12) from main_table so that it is no longer part of the active table, preparing it for archival.
  • Step 3: Attach the detached partition to the archive_table, effectively moving the data to the archival structure while maintaining the same partitioning scheme.

Alter this commands as per your environment and write a simple script which automates the whole process.

Since these approaches are based on our specific requirements, it is recommended to alter and test them in your test environment before implementing them in the production environment based on your requirements.

Conclusion

Archiving is crucial for maintaining the health and performance of a PostgreSQL database as it grows. By employing a well-thought-out archival strategy, you can significantly improve query performance, reduce storage costs, and ensure efficient backup processes. Whether you choose a manual insert/delete approach or a more sophisticated partitioning strategy, the key is to regularly assess your data growth and adjust your archival methods accordingly.

The two approaches we’ve discussed — moving data through insert/delete and partitioning with attaching/detaching — each offer distinct advantages depending on your use case. Choosing the right one depends on factors like your data access patterns, performance requirements, and system complexity. By embracing a suitable archival strategy, you can ensure that your PostgreSQL database remains scalable, performant, and cost-effective in the long run.

Stay tuned!!

Understanding pgAudit: PostgreSQL Auditing Made Easy

PostgreSQL is one of the most robust and flexible relational database management systems available today, offering a wide array of features for database administrators (DBAs) and developers alike. However, like any database, security and auditing are critical concerns when managing sensitive data. pgaudit is an extension for PostgreSQL that helps with auditing database activity, providing a clear and comprehensive audit trail of database operations.

In this blog post, we’ll dive into what pgaudit is, how to install and configure it, and explore some uses that make it essential for security and compliance.

What is pgAudit?

pgaudit is an open-source PostgreSQL extension that enhances PostgreSQL’s logging functionality by adding detailed audit logging capabilities. It logs all the database activity that is required to track and monitor user interactions, including queries, user sessions, and system-level events. By default, PostgreSQL provides basic logging, which includes information such as the start and end times of queries. However, for many compliance frameworks (e.g., ISO), it is often necessary to capture more granular data. This is where pgAudit can play a major role, by providing detailed activity logs, including:

  • SQL queries executed (including the values of parameters).
  • Successful or failed login attempts.
  • Changes to database objects (e.g., table creation or dropping).
  • DML operations (INSERT, UPDATE, DELETE).
  • SELECT queries with detailed information, such as the user issuing them.

Why pgAudit?

The need for robust auditing is more important than ever. Organizations dealing with sensitive information (such as financial or health data) need to comply with various regulations. pgaudit offers several key benefits:

  • Compliance with Regulatory Standards like GDPR ,ISO etc
  • Enhanced Security
  • Transparency and Monitoring
  • Simplified Troubleshooting

Installation and Configuration

To begin using pgaudit, you must first install the PostgreSQL development tools. Here , I have setup of Ubuntu 24.04 with PostgreSQL 17.2 .

sudo apt-get update
sudo apt-get install postgresql-contrib postgresql-server-dev-all

Once , we have the required tools installed, let’s install pgaudit

sudo apt-get install postgresql-17-pgaudit  
# Replace 17 with your PostgreSQL version

To complete the setup, we need to change a parameter in the postgresql.conf file

#In postgresql.conf file
shared_preload_libraries='pgaudit'
#It requires the restart of the postgresql services

Login to psql for creating and configuring the extension

postgres@ip-172-31-23-19:~$ psql
psql (17.2 (Ubuntu 17.2-1.pgdg24.04+1))
Type "help" for help.

postgres=# create extension pgaudit;
CREATE EXTENSION
postgres=# \dx
                   List of installed extensions
  Name   | Version |   Schema   |           Description
---------+---------+------------+---------------------------------
 pgaudit | 17.0    | public     | provides auditing functionality
 plpgsql | 1.0     | pg_catalog | PL/pgSQL procedural language
(2 rows)
#Configuring the pgaudit.log to'read'
postgres=# alter system set pgaudit.log to 'READ';
ALTER SYSTEM
postgres=# select pg_reload_conf();
 pg_reload_conf
----------------
 t
(1 row)

Let‘s look at some commonly used pgaudit.log settings:

  • WRITE – Log all SQL writes like INSERT, UPDATE, DELETE, TRUNCATE
  • FUNCTION – Log calls to functions and stored procedures
  • ROLE – Log user creation, role grants etc.
  • DDL – Log all DDL statements like CREATE TABLE
  • DML – Enable logging for all DML statements
  • MISC – Log miscellaneous commands like VACUUM, EXPLAIN

Verifying the log file

Let’s verify in our log file

2024-11-27 11:37:01.857 UTC [10329] LOG:  parameter "pgaudit.log" changed to "READ"
2024-11-27 11:38:00.473 UTC [10495] postgres@postgres LOG:  AUDIT: SESSION,1,1,READ,SELECT,,,"SELECT pg_catalog.lower(name) FROM pg_catalog.pg_settings  WHERE pg_catalog.lower(name) LIKE pg_catalog.lower('log\_dire%')

Here , we can see that pgaudit extension captures the select query as we set the pgaudit.log to 'read'.

Conclusion

pgaudit is a powerful extension for PostgreSQL that provides the necessary auditing capabilities for businesses to comply with regulations, enhance security, and track database activities. Its ability to log detailed information about SQL queries, user actions, and changes to database objects makes it an invaluable tool for DBAs, security teams, and compliance officers.

With pgaudit in place, you can ensure that your PostgreSQL databases are fully auditable, which is crucial for regulatory compliance and maintaining a secure database environment. Implementing it correctly in your PostgreSQL system can go a long way toward improving your organization’s security posture and reducing the risk of unauthorized data access or manipulation.

Introduction to pg_repack: Dealing with PostgreSQL bloat

PostgreSQL is a powerful and widely used relational database management system (RDBMS) known for its stability, scalability, and flexibility. However, over time, as data in PostgreSQL tables and indexes grows, performance can degrade due to fragmentation. This is where pg_repack comes in—a tool that helps in reorganising and optimising your PostgreSQL database to improve performance without significant downtime.In this blog post, we’ll cover what pg_repack is, its primary uses, and how to install and configure it for your PostgreSQL setup.

What is pg_repack?

pg_repack is an Open-source PostgreSQL extension designed to eliminate the bloat of table and index without requiring table locks or downtime. It removes bloat from tables and indexes and optionally restores clustered indexes’ physical order. It works online without holding an exclusive lock on the processed tables during processing.

Key Features of pg_repack

  • Online Repacking: Unlike the traditional VACUUM or REINDEX commands in PostgreSQL, pg_repack works online, meaning it doesn’t lock tables or indexes during the process. This makes it ideal for production environments where downtime is critical.
  • Index Rebuilding: pg_repack can rebuild indexes, removing fragmentation, and optimizing the storage for quicker access.
  • Table Repacking: It can also repack entire tables, reclaiming space occupied by dead tuples and reducing the size of the data files.
  • Database Repacking: In addition to individual tables and indexes, pg_repack can perform repacking on an entire database.
  • Space Savings: By reorganizing data and removing wasted space, pg_repack helps reduce the storage requirements of your PostgreSQL instance.

Common Uses of pg_repack

Here are some common scenarios where pg_repack can help:

  1. Reducing Table Bloat: Over time, as data is inserted, updated, and deleted in tables, PostgreSQL’s internal storage can become fragmented. Repacking these tables can restore performance by removing unused space.
  2. Rebuilding Indexes: Index fragmentation can slow down query performance. pg_repack rebuilds indexes in a way that eliminates fragmentation and optimizes query speed.
  3. Improving Query Performance: By eliminating bloat in both tables and indexes, queries that rely on these objects will experience faster execution times due to reduced I/O operations.
  4. Reclaiming Disk Space: After a large number of DELETE operations or bulk updates, you may find that your database size doesn’t shrink automatically. pg_repack can shrink the disk space used by these operations.
  5. Running in Production with Minimal Impact: Since pg_repack works online, you can run the tool in a live production environment without locking tables for long periods. This is particularly useful for large, active databases.

Installation and Configuration

The installation process for pg_repack is straightforward and depends on your operating system. Here are the steps to install on RHEL 9 running PG16.

[root@localhost ~]# yum install pg_repack_16
#Check for the version to verify download
pg_repack --version 

Once the packages are installed, add pg_repack to shared_preload_libraries in postgresql.conf

shared_preload_libraries='pg_repack'
#Restart the postgresql server

After the restart , login to the database server and create the extension

postgres=# create extension pg_repack;
CREATE EXTENSION
postgres=> \dx
                                  List of installed extensions
   Name    | Version |   Schema   |                         Description                          
-----------+---------+------------+--------------------------------------------------------------
 pg_repack | 1.5.0   | public     | Reorganize tables in PostgreSQL databases with minimal locks
 plpgsql   | 1.0     | pg_catalog | PL/pgSQL procedural language
(2 rows)

Testing

Create a Table

Create a table named test with columns id (integer) and name (varchar with a maximum length of 250 characters). The id column is set as the primary key:

postgres=# CREATE TABLE test (id int primary key, name varchar(250) );
CREATE TABLE

The table has been successfully created.

Insert 100,000 Rows

insert 100,000 rows into the test table.

postgres=# INSERT INTO test (id, name)
SELECT
    gs.id,
    'name_' || gs.id AS name                                           
FROM generate_series(1, 100000) AS gs(id);
INSERT 0 100000

100,000 rows have been successfully inserted.

Check the Size of the Table

After inserting the rows, check the size of the test table:

postgres=# \dt+
                                   List of relations
 Schema | Name | Type  |  Owner   | Persistence | Access method |  Size   | Description 
--------+------+-------+----------+-------------+---------------+---------+-------------
 public | test | table | postgres | permanent   | heap          | 4360 kB | 
(1 row)

The size of the test table is 4360 kB.

Update All Rows

Update all rows in the test table, setting the name column to ‘somename’ for all records:

postgres=# update test set name ='somename';
UPDATE 100000

100,000 rows have been updated.

Check the Size of the Table After Update

postgres=# \dt+
                                   List of relations
 Schema | Name | Type  |  Owner   | Persistence | Access method |  Size   | Description 
--------+------+-------+----------+-------------+---------------+---------+-------------
 public | test | table | postgres | permanent   | heap          | 8688 kB | 
(1 row)

The size of the table has increased to 8688 kB.

Delete Rows

postgres=# DELETE FROM test WHERE id BETWEEN 50000 AND 100000;
DELETE 50001

50,001 rows have been deleted.

Check the Size of the Table After Deletion

After the deletion, check the size of the test table:

postgres=# \dt+
                                   List of relations
 Schema | Name | Type  |  Owner   | Persistence | Access method |  Size   | Description 
--------+------+-------+----------+-------------+---------------+---------+-------------
 public | test | table | postgres | permanent   | heap          | 6520 kB | 
(1 row)

The size of the table is now 6520 kB.

Using pg_repack to Reclaim Space in PostgreSQL.

To reclaim space in a PostgreSQL table, you can use the pg_repack extension. Here’s the process to repack a table and check the space before and after the operation:

To repack the test table and reclaim the unused space

[postgres@localhost ~]$ pg_repack --table=test -d postgres -e
LOG: (query) SET search_path TO pg_catalog, pg_temp, public
LOG: (query) select repack.version(), repack.version_sql()
LOG: (query) SET statement_timeout = 0
LOG: (query) SET search_path = pg_catalog, pg_temp, public
LOG: (query) SET client_min_messages = warning
LOG: (query) SELECT r FROM (VALUES ($1, 'r')) AS given_t(r,kind) WHERE NOT EXISTS(  SELECT FROM repack.tables WHERE relid=to_regclass(given_t.r)) AND NOT EXISTS(  SELECT FROM pg_catalog.pg_class c WHERE c.oid=to_regclass(given_t.r) AND c.relkind = given_t.kind AND given_t.kind = 'p')
LOG: 	(param:0) = test
LOG: (query) SELECT t.*, coalesce(v.tablespace, t.tablespace_orig) as tablespace_dest FROM repack.tables t,  (VALUES (quote_ident($1::text))) as v (tablespace) WHERE (relid = $2::regclass) ORDER BY t.relname, t.schemaname
LOG: 	(param:0) = (null)
LOG: 	(param:1) = test
INFO: repacking table "public.test"
LOG: (query) SELECT pg_try_advisory_lock($1, CAST(-2147483648 + $2::bigint AS integer))
LOG: 	(param:0) = 16185446
LOG: 	(param:1) = 25021
LOG: (query) BEGIN ISOLATION LEVEL READ COMMITTED
LOG: (query) SET LOCAL lock_timeout = 100
LOG: (query) LOCK TABLE public.test IN ACCESS EXCLUSIVE MODE
LOG: (query) RESET lock_timeout
LOG: (query) SELECT pg_get_indexdef(indexrelid) FROM pg_index WHERE indrelid = $1 AND NOT indisvalid
LOG: 	(param:0) = 25021
LOG: (query) SELECT indexrelid, repack.repack_indexdef(indexrelid, indrelid, $2, FALSE)  FROM pg_index WHERE indrelid = $1 AND indisvalid
LOG: 	(param:0) = 25021
LOG: 	(param:1) = (null)
LOG: (query) SELECT repack.conflicted_triggers($1)
LOG: 	(param:0) = 25021
LOG: (query) SELECT repack.create_index_type(25024,25021)
LOG: (query) SELECT repack.create_log_table(25021)
LOG: (query) CREATE TRIGGER repack_trigger AFTER INSERT OR DELETE OR UPDATE ON public.test FOR EACH ROW EXECUTE PROCEDURE repack.repack_trigger('id')
LOG: (query) ALTER TABLE public.test ENABLE ALWAYS TRIGGER repack_trigger
LOG: (query) SELECT repack.disable_autovacuum('repack.log_25021')
LOG: (query) BEGIN ISOLATION LEVEL READ COMMITTED
LOG: (query) SELECT pg_backend_pid()
LOG: (query) SELECT pid FROM pg_locks WHERE locktype = 'relation' AND granted = false AND relation = 25021 AND mode = 'AccessExclusiveLock' AND pid <> pg_backend_pid()
LOG: (query) COMMIT
LOG: (query) BEGIN ISOLATION LEVEL SERIALIZABLE
LOG: (query) SELECT set_config('work_mem', current_setting('maintenance_work_mem'), true)
LOG: (query) SELECT coalesce(array_agg(l.virtualtransaction), '{}')   FROM pg_locks AS l   LEFT JOIN pg_stat_activity AS a     ON l.pid = a.pid   LEFT JOIN pg_database AS d     ON a.datid = d.oid   WHERE l.locktype = 'virtualxid'   AND l.pid NOT IN (pg_backend_pid(), $1)   AND (l.virtualxid, l.virtualtransaction) <> ('1/1', '-1/0')   AND (a.application_name IS NULL OR a.application_name <> $2)  AND a.query !~* E'^\\s*vacuum\\s+'   AND a.query !~ E'^autovacuum: '   AND ((d.datname IS NULL OR d.datname = current_database()) OR l.database = 0)
LOG: 	(param:0) = 41042
LOG: 	(param:1) = pg_repack
LOG: (query) DELETE FROM repack.log_25021
LOG: (query) SELECT pid FROM pg_locks WHERE locktype = 'relation' AND granted = false AND relation = 25021 AND mode = 'AccessExclusiveLock' AND pid <> pg_backend_pid()
LOG: (query) SET LOCAL lock_timeout = 100
LOG: (query) LOCK TABLE public.test IN ACCESS SHARE MODE
LOG: (query) RESET lock_timeout
LOG: (query) SELECT repack.create_table($1, $2)
LOG: 	(param:0) = 25021
LOG: 	(param:1) = pg_default
LOG: (query) INSERT INTO repack.table_25021 SELECT id,name FROM ONLY public.test
LOG: (query) SELECT repack.disable_autovacuum('repack.table_25021')
LOG: (query) COMMIT
LOG: (query) CREATE UNIQUE INDEX index_25024 ON repack.table_25021 USING btree (id)
LOG: (query) SELECT repack.repack_apply($1, $2, $3, $4, $5, $6)
LOG: 	(param:0) = SELECT * FROM repack.log_25021 ORDER BY id LIMIT $1
LOG: 	(param:1) = INSERT INTO repack.table_25021 VALUES ($1.*)
LOG: 	(param:2) = DELETE FROM repack.table_25021 WHERE (id) = ($1.id)
LOG: 	(param:3) = UPDATE repack.table_25021 SET (id, name) = ($2.id, $2.name) WHERE (id) = ($1.id)
LOG: 	(param:4) = DELETE FROM repack.log_25021 WHERE id IN (
LOG: 	(param:5) = 1000
LOG: (query) SELECT pid FROM pg_locks WHERE locktype = 'virtualxid' AND pid <> pg_backend_pid() AND virtualtransaction = ANY($1)
LOG: 	(param:0) = {}
LOG: (query) SAVEPOINT repack_sp1
LOG: (query) SET LOCAL lock_timeout = 100
LOG: (query) LOCK TABLE public.test IN ACCESS EXCLUSIVE MODE
LOG: (query) RESET lock_timeout
LOG: (query) SELECT repack.repack_apply($1, $2, $3, $4, $5, $6)
LOG: 	(param:0) = SELECT * FROM repack.log_25021 ORDER BY id LIMIT $1
LOG: 	(param:1) = INSERT INTO repack.table_25021 VALUES ($1.*)
LOG: 	(param:2) = DELETE FROM repack.table_25021 WHERE (id) = ($1.id)
LOG: 	(param:3) = UPDATE repack.table_25021 SET (id, name) = ($2.id, $2.name) WHERE (id) = ($1.id)
LOG: 	(param:4) = DELETE FROM repack.log_25021 WHERE id IN (
LOG: 	(param:5) = 0
LOG: (query) SELECT repack.repack_swap($1)
LOG: 	(param:0) = 25021
LOG: (query) COMMIT
LOG: (query) BEGIN ISOLATION LEVEL READ COMMITTED
LOG: (query) SAVEPOINT repack_sp1
LOG: (query) SET LOCAL lock_timeout = 100
LOG: (query) LOCK TABLE public.test IN ACCESS EXCLUSIVE MODE
LOG: (query) RESET lock_timeout
LOG: (query) SELECT repack.repack_drop($1, $2)
LOG: 	(param:0) = 25021
LOG: 	(param:1) = 4
LOG: (query) COMMIT
LOG: (query) BEGIN ISOLATION LEVEL READ COMMITTED
LOG: (query) ANALYZE public.test
LOG: (query) COMMIT
LOG: (query) SELECT pg_advisory_unlock($1, CAST(-2147483648 + $2::bigint AS integer))
LOG: 	(param:0) = 16185446
LOG: 	(param:1) = 25021

Checking the Table Size After Repacking

After the repack process completes, you can check the table size again:


postgres=# \dt+
                                   List of relations
 Schema | Name | Type  |  Owner   | Persistence | Access method |  Size   | Description 
--------+------+-------+----------+-------------+---------------+---------+-------------
 public | test | table | postgres | permanent   | heap          | 2192 kB | 
(1 row)

The size of the test table has reduced to 2192 kB, indicating that the unused space has been reclaimed, and the table’s storage has been optimized.

Check and use the option available based on your requirement.

[postgres@localhost ~]$ pg_repack --help
pg_repack re-organizes a PostgreSQL database.

Usage:
  pg_repack [OPTION]... [DBNAME]
Options:
  -a, --all                 repack all databases
  -t, --table=TABLE         repack specific table only
  -I, --parent-table=TABLE  repack specific parent table and its inheritors
  -c, --schema=SCHEMA       repack tables in specific schema only
  -s, --tablespace=TBLSPC   move repacked tables to a new tablespace
  -S, --moveidx             move repacked indexes to TBLSPC too
  -o, --order-by=COLUMNS    order by columns instead of cluster keys
  -n, --no-order            do vacuum full instead of cluster
  -N, --dry-run             print what would have been repacked
  -j, --jobs=NUM            Use this many parallel jobs for each table
  -i, --index=INDEX         move only the specified index
  -x, --only-indexes        move only indexes of the specified table
  -T, --wait-timeout=SECS   timeout to cancel other backends on conflict
  -D, --no-kill-backend     don't kill other backends when timed out
  -Z, --no-analyze          don't analyze at end
  -k, --no-superuser-check  skip superuser checks in client
  -C, --exclude-extension   don't repack tables which belong to specific extension

Connection options:
  -d, --dbname=DBNAME       database to connect
  -h, --host=HOSTNAME       database server host or socket directory
  -p, --port=PORT           database server port
  -U, --username=USERNAME   user name to connect as
  -w, --no-password         never prompt for password
  -W, --password            force password prompt

Generic options:
  -e, --echo                echo queries
  -E, --elevel=LEVEL        set output message level
  --help                    show this help, then exit
  --version                 output version information, then exit

Read the website for details: <https://reorg.github.io/pg_repack/>.
Report bugs to <https://github.com/reorg/pg_repack/issues>.

Conclusion

pg_repack is a powerful tool for optimizing PostgreSQL databases by reducing fragmentation and reclaiming disk space. It helps maintain high performance in production systems by reorganizing tables and indexes online, with minimal impact on ongoing operations. By regularly running pg_repack, you can keep your database lean, fast, and efficient.

With its simple installation and straightforward usage, pg_repack is an essential tool for PostgreSQL administrators who want to ensure their databases remain performant as they grow. Whether you’re working with a large, active database or a smaller, more static one, pg_repack can help you maintain optimal performance with minimal effort.

An Introduction to migrating from Oracle to PostgreSQL using ora2pg

Introduction:

Here’s my first attempt at blogging about my favourite database PostgreSQL: The World’s Most Advanced Open Source Relational Database. With it’s robust features, open-source nature, and growing ecosystem, migrating to PostgreSQL opens up exciting new possibilities for your database environment. Migrating a database from one system to another can be complex, especially when dealing with large and complex databases. However, with the right tools and techniques, this process can be streamlined significantly. In this blog post, we will explore the migration of an Oracle database to a PostgreSQL database using the ora2pg tool, with a specific focus on running Oracle within a Docker container.

Assumptions:

a) Oracle Database: Running in a Docker container-Oracle 21c.
b) PostgreSQL: Running on a Docker container with version 16

Preparedness of the system:

  • Make sure your docker containers for Oracle and Postgres are up and running
  • As ora2pg is written in Perl language, we need to install Perl-core on the Oracle container using the below command.
bash-4.2# yum install perl-core

Download ora2pg-24.3V

Here are the links to download ora2pg.

>> Click On this link https://ora2pg.darold.net/documentation.html

>> Click on Download =>Source code(tar.gz)

Copy the ora2pg to the Oracle database and unzip the tar file.
NB: Following are executed on a power shell prompt

C:\Users\lokes>cd .\Downloads\
PS C:\Users\lokes\Downloads>docker cp ora2pg-24.3.tar.gz oracle-db:/home/downloads
Successfully copied 579kB to oracle-db:/home/downloads

Let’s connect docker bash(bash-4.2) using the below command.

C:\Users\lokes>docker exec -u 0 -it oracle-db bash
bash-4.2# cd downloads/
bash-4.2# ls
ora2pg-24.3.tar.gz
bash-4.2#  unzip ora2pg-24.3.tar.gz
bash-4.2# ls -lrt
total 568
drwxrwxr-x 6 root root   4096 Mar 28  2024 ora2pg-24.3
-rwxr-xr-x 1 root root 576965 Nov  7 09:59 ora2pg-24.3.tar.gz

Installation of ora2pg

Check the Makefile.PL file in the ora2pg directory and run the following

bash-4.2# cd ora2pg-24.3
bash-4.2# ls -lrt
total 668
drwxrwxr-x 2 root root   4096 Mar 28  2024 scripts
drwxrwxr-x 5 root root   4096 Mar 28  2024 packaging
drwxrwxr-x 3 root root   4096 Mar 28  2024 lib
drwxrwxr-x 2 root root   4096 Mar 28  2024 doc
-rw-rw-r-- 1 root root 374342 Mar 28  2024 changelog
-rw-rw-r-- 1 root root 171271 Mar 28  2024 README
-rw-rw-r-- 1 root root  75191 Mar 28  2024 Makefile.PL
-rw-rw-r-- 1 root root    180 Mar 28  2024 MANIFEST
-rw-rw-r-- 1 root root  32472 Mar 28  2024 LICENSE
-rw-rw-r-- 1 root root     21 Mar 28  2024 INSTALL

bash-4.2# perl Makefile.PL
bash-4.2# ls -lrt
total 784
drwxrwxr-x 5 root root   4096 Mar 28  2024 packaging
drwxrwxr-x 3 root root   4096 Mar 28  2024 lib
drwxrwxr-x 2 root root   4096 Mar 28  2024 doc
-rw-rw-r-- 1 root root 374342 Mar 28  2024 changelog
-rw-rw-r-- 1 root root 171271 Mar 28  2024 README
-rw-rw-r-- 1 root root  75191 Mar 28  2024 Makefile.PL
-rw-rw-r-- 1 root root    180 Mar 28  2024 MANIFEST
-rw-rw-r-- 1 root root  32472 Mar 28  2024 LICENSE
-rw-rw-r-- 1 root root     21 Mar 28  2024 INSTALL
-rw-r--r-- 1 root root  70666 Nov  7 10:10 ora2pg.conf.dist
drwxrwxr-x 2 root root   4096 Nov  7 10:10 scripts
-rw-r--r-- 1 root root  28787 Nov  7 10:10 Makefile
-rw-r--r-- 1 root root    545 Nov  7 10:10 MYMETA.yml
-rw-r--r-- 1 root root    956 Nov  7 10:10 MYMETA.json
drwxr-xr-x 8 root root   4096 Nov  7 10:10 blib
-rw-r--r-- 1 root root      0 Nov  7 10:10 pm_to_blib

Create the ora2pg.conf file using ora2pg.conf.dist as reference.

bash-4.2# cp ora2pg.conf.dist ora2pg.conf
bash-4.2# ls -lrt
total 856
drwxrwxr-x 5 root root   4096 Mar 28  2024 packaging
drwxrwxr-x 3 root root   4096 Mar 28  2024 lib
drwxrwxr-x 2 root root   4096 Mar 28  2024 doc
-rw-rw-r-- 1 root root 374342 Mar 28  2024 changelog
-rw-rw-r-- 1 root root 171271 Mar 28  2024 README
-rw-rw-r-- 1 root root  75191 Mar 28  2024 Makefile.PL
-rw-rw-r-- 1 root root    180 Mar 28  2024 MANIFEST
-rw-rw-r-- 1 root root  32472 Mar 28  2024 LICENSE
-rw-rw-r-- 1 root root     21 Mar 28  2024 INSTALL
-rw-r--r-- 1 root root  70666 Nov  7 10:10 ora2pg.conf.dist
drwxrwxr-x 2 root root   4096 Nov  7 10:10 scripts
-rw-r--r-- 1 root root  28787 Nov  7 10:10 Makefile
-rw-r--r-- 1 root root    545 Nov  7 10:10 MYMETA.yml
-rw-r--r-- 1 root root    956 Nov  7 10:10 MYMETA.json
drwxr-xr-x 8 root root   4096 Nov  7 10:10 blib
-rw-r--r-- 1 root root      0 Nov  7 10:10 pm_to_blib

Configuration setting in ora2pg.conf file

ORACLE_HOME     /opt/oracle/product/21c/dbhome_1
ORACLE_DSN      dbi:Oracle:host=172.17.0.2;sid=MYCDB;port=1521
ORACLE_USER     sys
ORACLE_PWD      oracle123
PG_VERSION     	16
USER_GRANTS     1
EXPORT_SCHEMA   1
TRANSACTION   	READONLY
SCHEMA   	ABC
TYPE         	TABLE 

Set the environment variables if they are not as per below.

bash-4.2# echo $LD_LIBRARY_PATH
/opt/oracle/product/21c/dbhome_1/lib:/usr/lib
bash-4.2# echo $ORACLE_HOME
/opt/oracle/product/21c/dbhome_1

Install the DBD::Oracle library for the Oracle database

bash-4.2# yum install gcc
bash-4.2# yum install libaio-devel
bash-4.2# perl -MCPAN -e 'install DBD::Oracle'

Check the version of ora2pg

bash-4.2# ora2pg -t SHOW_VERSION -c ora2pg.conf
Oracle Database 21c Enterprise Edition Release 21.0.0.0.0

Now, Ora2Pg connection is successful to the Oracle server.

Export the schemas from the Oracle server using the below command

ora2pg  -c /home/downloads/ora2pg-24.3/ora2pg.conf -d -o TABLE_persons.sql

Use the following switches for debugging the command:

 -c | --conf file: Set an alternate configuration file other than the
                        default /etc/ora2pg/ora2pg.conf.
 -d | --debug: Enable verbose output.
 -o | --out file: Set the path to the output file where SQL will
                        be written. Default: output.sql in running directory.

Importing to PostgreSQL server.

Open the Windows command line and copy the file to the local
NB: Following are executed on a power shell prompt

C:\Users\lokes\Downloads> docker cp oracle-db:/home/downloads/ora2pg-24.3/output/TABLE_persons.sql .
Successfully copied 2.56kB to C:\Users\lokes\Downloads\.
C:\Users\lokes\Downloads> dir TABLE*.sql
    Directory: C:\Users\lokes\Downloads
Mode          LastWriteTime         Length Name
----          -------------         ------ ----
-a----        13-11-2024 11:58      494    TABLE_persons.sql
PS C:\Users\lokes\Downloads> docker cp .\TABLE_persons.sql postgres:/home/data
Successfully copied 2.56kB to postgres:/home/data

Login to the Postgres server using the below command and create 

PS C:\Users\lokes> docker exec -it postgres psql -U postgres -d postgres -h 127.0.0.1 -p 5432
postgres=# Create role abc login createdb nosuperuser password 'postgres';
  • LOGIN: Grants the ability to log into the database server.
  • CREATE DB: Grants the ability to create new databases.
  • PASSWORD: Sets the password for the role to ‘postgres’.

Open docker in the Postgres terminal and import the schema using 

# cd data
# ls -lrt
total 4
-rwxr-xr-x 1 root root 506 Nov 11 06:35 TABLE_persons.sql
# psql --version
psql (PostgreSQL) 16.4 (Debian 16.4-1.pgdg120+2)

# psql -f TABLE_persons.sql -U postgres -d postgres
SET
CREATE SCHEMA
ALTER SCHEMA
SET
CREATE TABLE
Verify the table
postgres=# select * from abc.persons;
 personid | lastname | firstname | address | city
----------+----------+-----------+---------+------
(0 rows)

Suggestion: Since Ora2Pg is written in Perl, using it for data migration is not recommended. Instead, use Ora2Pg for schema migration, and migrating data, consider leveraging ETL tools like Pentaho to design a more efficient and scalable data migration strategy.

Conclusion:

Migrating an Oracle database to PostgreSQL using the ora2pg tool can significantly streamline the transition process. This approach allows for a structured and automated method of transferring schemas from Oracle to PostgreSQL, facilitating compatibility between these two powerful database platforms.
In this specific case, after setting up Oracle 21c and PostgreSQL 16 in Docker containers, the migration steps involved:

  • Installation of ora2pg on the Oracle Docker container.
  • Configuration of ora2pg, ensuring that the correct Oracle connection settings were in place.
  • Exporting the Oracle schema using ora2pg, and then importing the schema into PostgreSQL.

While ora2pg is effective for schema migration, it’s important to note that this tool, being written in Perl, may not be the best choice for data migration due to performance limitations and complexity. You could use ora2pg for schema migration, and rely on ETL tools like Pentaho for migrating user/application data. This would be a much better and recommended way for a more scalable, efficient, and robust data transfer.

Schedule a Call for a Free schema assessment

Automating PostgreSQL Tasks with pg_cron

In the world of database management, automation is key to maintaining efficiency and ensuring that routine tasks are executed consistently. For PostgreSQL users, the pg_cron extension provides a powerful way to schedule jobs directly within the database. In this post, we’ll explore what pg_cron is, how to install it, and how to use it effectively.

What is pg_cron?

pg_cron is an extension for PostgreSQL that allows you to run scheduled jobs using familiar cron syntax. With this, you can automate various tasks, such as database maintenance, data processing, and reporting, all from within your PostgreSQL environment. This eliminates the need for external cron jobs or scripts, making your setup cleaner and more integrated.

Installing pg_cron

Identify the version of pg_cron that is compatible with your PostgreSQL installation. For example, to install the pg_cron (pg_cron_16) extension on PostgreSQL 16, run:

#For RHEL / Fedora Derivatives:
sudo yum install -y pg_cron_16

#For Ubuntu / Debian Derivatives:
sudo apt-get install -y postgresql-16-cron

Setting Up pg_cron

To start the pg_cron background worker when PostgreSQL starts, you need to add pg_cron to shared_preload_libraries in postgresql.conf . Note that pg_cron does not run any jobs while the server is in hot standby mode, but it automatically starts when the server is promoted.

By default, the pg_cron background worker expects its metadata tables to be created in the postgres database. However, you can configure this by setting the cron.database_name configuration parameter in postgresql.conf.

#Parameters need to be change for pg_cron 
shared_preload_libraries = 'pg_cron'
cron.database_name = 'postgres'

After changing the parameter and restarting the PostgreSQL server.

You can create the pg_cron and metadata tables using

postgres=# CREATE EXTENSION pg_cron;
CREATE EXTENSION

After creating extension, grant the usage privileges to user postgres

postgres=# GRANT USAGE ON SCHEMA cron TO postgres;
GRANT

Let’s schedule a vacuum operation on the postgres database at 10 P.M every day.

postgres=# SELECT cron.schedule('0 22 * * *', 'VACUUM');
 schedule 
----------
        1
(1 row)

Let’s see how we can manage the scheduled jobs

postgres=# SELECT * FROM cron.job;
 jobid |  schedule   | command | nodename  | nodeport | database | username | active | jobname
-------+-------------+---------+-----------+----------+----------+----------+--------+---------
     1 | 0 22 * * *  | VACUUM  | localhost |     5432 | postgres | postgres | t      |
(1 row)

To check the logs of the scheduled activities.

postgres=# select * from cron.job_run_details;
-[ RECORD 1 ]--+----------------------------------------------------------------------------------------------------------
jobid | 1
runid | 1
job_pid | 35683
database | postgres
username | postgres
command | VACUUM
status | succeeded
return_message | VACUUM
start_time | 2024-10-01 13:27:29.473088+05:30
end_time | 2024-10-01 13:27:29.47479+05:30

Here, the breakdown of each field.

  • jobid : This is the unique identifier for the scheduled job. Each job scheduled in pg_cron has a distinct jobid.
  • runid : This indicates the unique identifier for this specific execution of the job. If the job is scheduled to run multiple times, each execution will have a different runid.
  • job_pid : This is the process ID of the PostgreSQL backend process that executed the job. It can be useful for tracking the job’s execution in system logs.
  • database : This shows the database context in which the job was run. In this case, the job was executed in the postgres database.
  • username : This indicates the username under which the job was executed. Here, the job ran as the postgres user.
  • command : This is the SQL command that was executed as part of the job. In this instance, it indicates that a VACUUM operation was performed.
  • status : This shows the outcome of the job execution. A status of succeeded indicates that the job completed successfully without errors.
  • return_message : This message reflects the output from the executed command. In this case, it confirms that the VACUUM command was executed.
  • start_time : This is the timestamp when the job started executing. It includes the time zone offset (+05:30), indicating the local time zone.
  • end_time : This is the timestamp when the job finished executing. It also includes the time zone offset.

To unschedule a previously scheduled job in pg_cron, run:

SELECT cron.unschedule(job_id);

Conclusion

pg_cron is a powerful tool that can significantly enhance your PostgreSQL experience by simplifying job scheduling and automation. By integrating routine tasks directly within the database, you can save time and reduce complexity. Whether you’re handling maintenance, data processing, or reporting, pg_cron provides the flexibility and control you need.

Ready to automate your PostgreSQL tasks? Give pg_cron a try, and see how it can streamline your database operations! Contact us today to know more about our database maintenance services.

Happy Automation!!

The 101 of Building Data Warehouse

Scope and Requirements:

The scope and requirements for building a Data Warehouse (DWH) involve many factors. Let’s look at them one by one. First comes the volume of data, understanding that the size and complexity of DWH depend on the amount of data stored and processed, Choosing the DWH on-premise or cloud, based on the storage, control, performance, and accessibility. Coming to the architecture we have to keep in mind the relational model, or hybrid approach based on the user requirements. Along with the above, we have the end-users who access the DWH, We need to keep in mind the complexity of the analytics and reporting done using DWH matches their requirements, the most important thing is the data ingestion i.e the method of ingestion like Truncate and load, CDC, Scheduled incremental load.

Choose your Architecture and Platform:

Choosing an architecture and platform for a solution, there are multiple critical factors to be considered, which involves technical approach like deciding right tools and services and data pipelines.

Tools:

This involves identifying them based on data ingestion, transformation and storage. Then we will go with either open-source tools like Apache airflow or PostgreSQL or cloud-based tools like AWS DataLake or Google Dataflow.

Data Pipeline:

Data pipeline involves Data ingestion from various sources, Processing is applying transformation and cleaning, Storage is processing data in right format, Access and Analytics is like making data available for decision-making. The complexity and scalability depends on chosen tools.

Hybrid vs CSP (Cloud Service Provider) services:

A combination of both on-premise infrastructure and cloud services is hybrid. This is ideal for organisations which maintain sensitive data on-premises but need scalability and flexibility on cloud.
Coming to CSP is fully managed cloud services like AWS, GCP, Azure provides pre-built, fully managed services reducing operational overhead. Major points to be considered are scalability by managing resources based on demand, Cost-effective by paying for what we use.

Choosing semi-automated tools vs Brute-force approach of building from scratch:

Semi-automated tools are platform-as-a-service (PaaS) or software-as-a-service (SaaS) that automate much of the operational overhead such as AWS redshift or snowflake. These helps in reducing time and complexity.
Brute-Force approach: Building all from scratch gives full control over customization but requires more time, resource and experience

Design your data model and ETL process:

First we should have a clear understanding of business requirements, data sources, target data warehouse schema, then design the extraction, transformation and loading steps, ensuring data checks and validation. 

  • Choose an ETL tool based on data sources and requirements. Tools like Talend, Informatica.
  • Data sources may be heterogeneous and homogeneous, this tool should support both regardless of type.
  • Implementing data auditing to check data is complete, accurate and consistent by tracking data during ETL process.
  • Ensure data flow meets resources may be heterogeneous and homogeneous, this tool should support both regardless of type.
  • Ensure that data loaded to DWH is still intact, that it is not corrupted or changed during the ETL process.
  • COming to performance optimization, especially with large datasets by implementing parallel processing to ensure efficient data handling and quicker load times.

Maintain and Optimise:

Once DWH is up and running, we need to focus on maintaining and optimising its long term usage.

  • DWH should be integrated with BI and ML tools like Helical insights or Tableau to enable processing, real-time reporting and advanced analytics.
  • We can choose options like columnar storage for analytics and read-focused queries, object storage for unstructured data, HTAP for real-time analytics on operational data, DSS storage is suitable for complex queries involving large datasets. 
  • Automate data cleansing and validation to ensure accuracy and consistency throughout the ETL pipeline by using Talend or Informatica.
  • Optimise performance through indexing, partitioning and caching, and also implementing parallel processing to speedup ETL and query execution.
  • We can also use tools like AWS Cloudwatch or Datadog to monitor query performance, resource utilisation, and data ingestion rates.

Conclusion:

Building a data warehouse is no small feat—it requires careful planning, the right tools, and a deep understanding of data needs. From selecting the right architecture to defining ETL pipelines and ensuring data governance, each step plays a crucial role in creating a system that delivers meaningful insights. As businesses become more data-driven, mastering the fundamentals of building a robust data warehouse is essential to stay ahead in today’s competitive landscape.

Whether you’re just starting out or refining an existing system, always remember that a well-constructed data warehouse isn’t just a repository—it’s the foundation for better decision-making and scalable growth. The journey may be complex, but the payoff—empowering data-backed strategies—is worth the effort.