
High-Level Upgrade Flow
The complete upgrade follows eight sequential phases:
Phase 1: Pre-checks on both servers—version confirmation, replication health, and a mandatory full backup.
Phase 2: MaxScale — isolate the slave by setting it to maintenance mode.
Phase 3: Upgrade Slave (server2) — remove old packages, configure 11.4 repo, install, upgrade system tables, reconfigure replication.
Phase 4: Restore Slave to MaxScale pool — verify replication, clear maintenance.
Phase 5: Traffic switchover — promote server2 as the new Primary via MaxScale. Near-zero downtime.
Phase 6: Upgrade Master (server1) — same procedure as slave, while it is isolated in maintenance.
Phase 7: Restore server1 as Master — switchover back, re-establish replication.
Phase 8: Final validation — confirm version, replication, GTID state, MaxScale server list.
Always upgrade the Slave (Replica) first, then upgrade the Master (Primary). Upgrading in reverse order risks breaking replication, causing schema mismatches, and leading to data loss.
The slave-first approach ensures that at least one node is always running a stable version. If the slave upgrade fails, the master continues serving production traffic without interruption.
Step 0: Prerequisites
Verify the following conditions before starting any upgrade activity:
- MariaDB 10.5 is running and stable on both nodes
- GTID replication is active with zero lag on the slave
- MaxScale HA is configured and routing traffic correctly
- At least one healthy node must remain available throughout the process
Step 1: Pre-Checks on Both Servers
Before making any changes, confirm the current state of both servers: version, replication health, and data integrity.
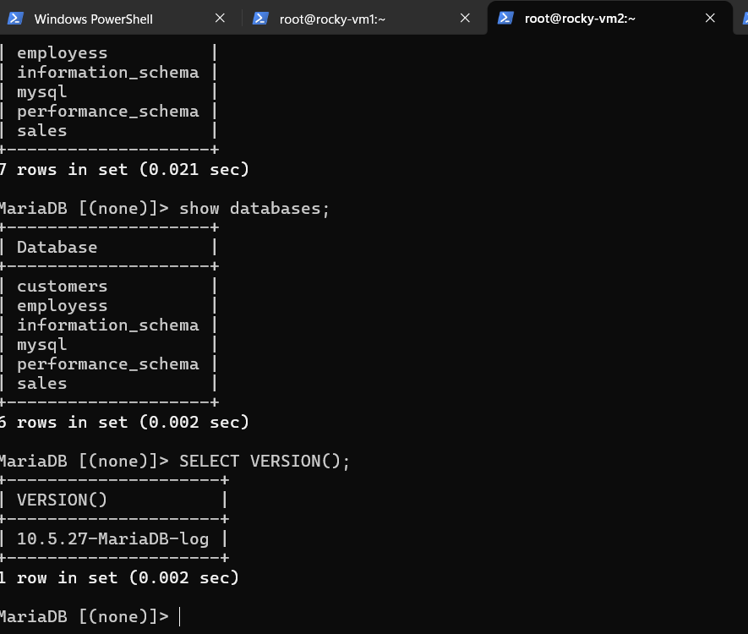
1.1 Verify Version
Run on both nodes:
SELECT VERSION();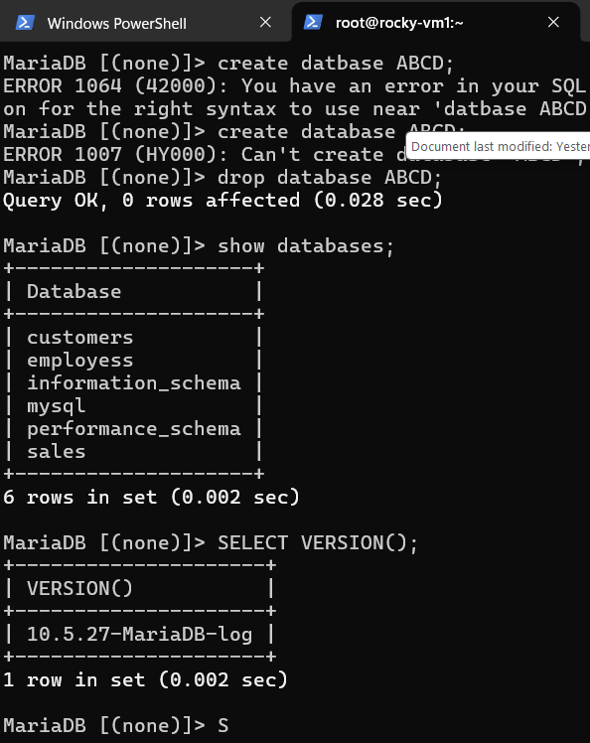
1.2 Check Replication Health on Slave
Confirm both IO and SQL threads are running with no replication lag:
SHOW SLAVE STATUS\G;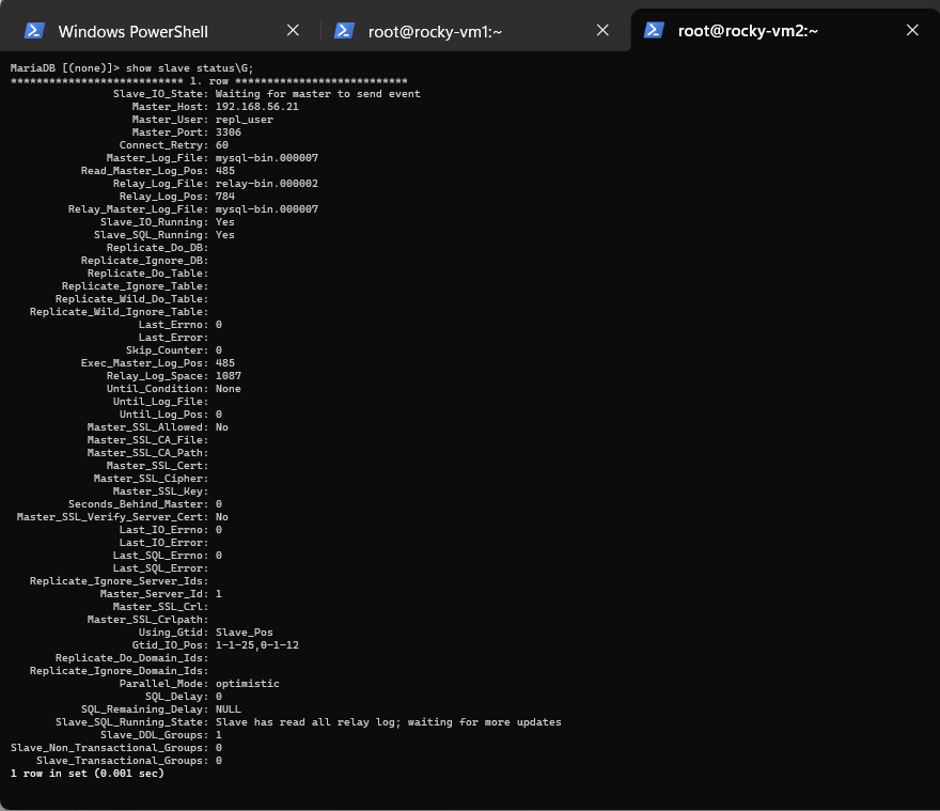
1.3 Take a Full Backup on Master
This backup is the only rollback option if the upgrade fails. Do not proceed without it.
mysqldump --all-databases --single-transaction --routines --triggers --events > full_backup.sql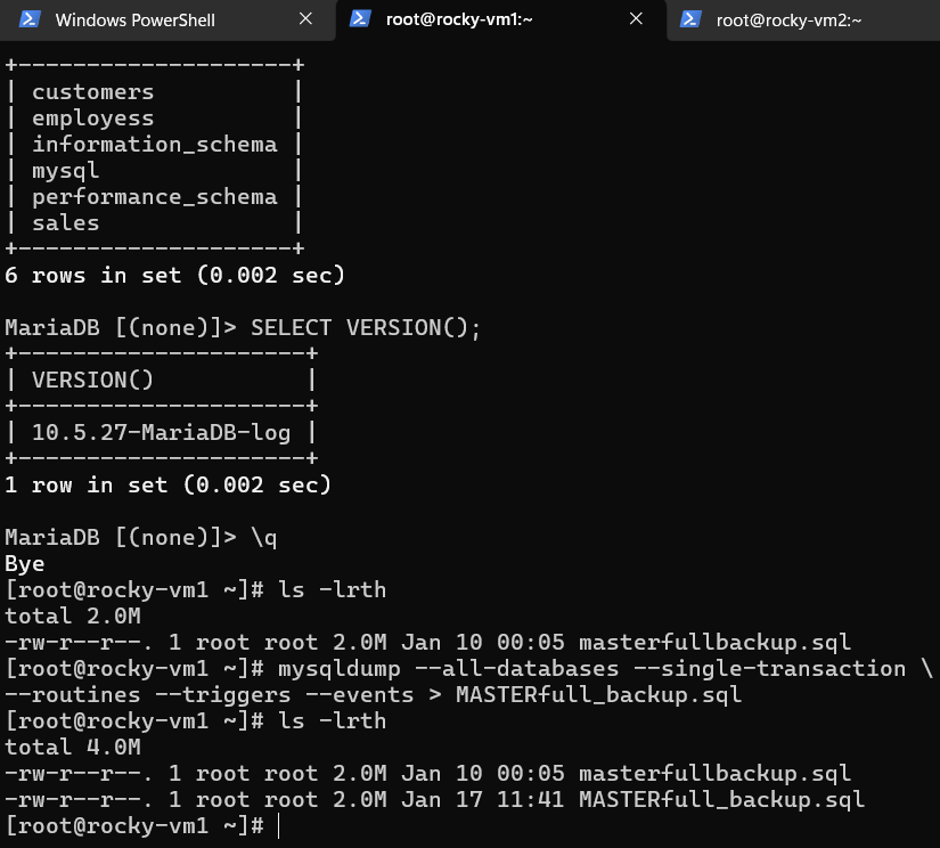
NOTE: This is a mandatory step. The backup covers all databases, stored routines, triggers, and events. Skipping it means there is no recovery path in a rollback scenario.
Step 2: MaxScale: Put Slave in Maintenance
Before touching server2, remove it from the MaxScale routing pool. This prevents MaxScale from sending read queries to a node that is about to be stopped.
maxctrl list servers           # confirm current state of all servers
maxctrl set server server2 maintenance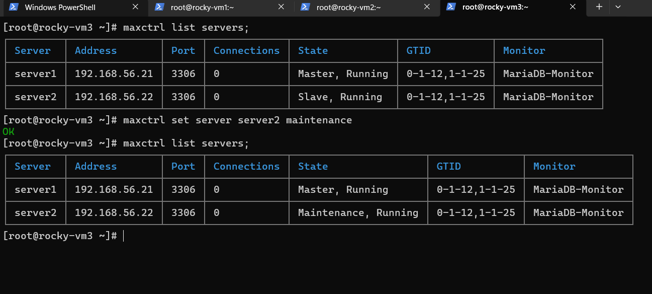
Step 3: Upgrade Slave
3.1 Stop MariaDB Service
systemctl stop mariadb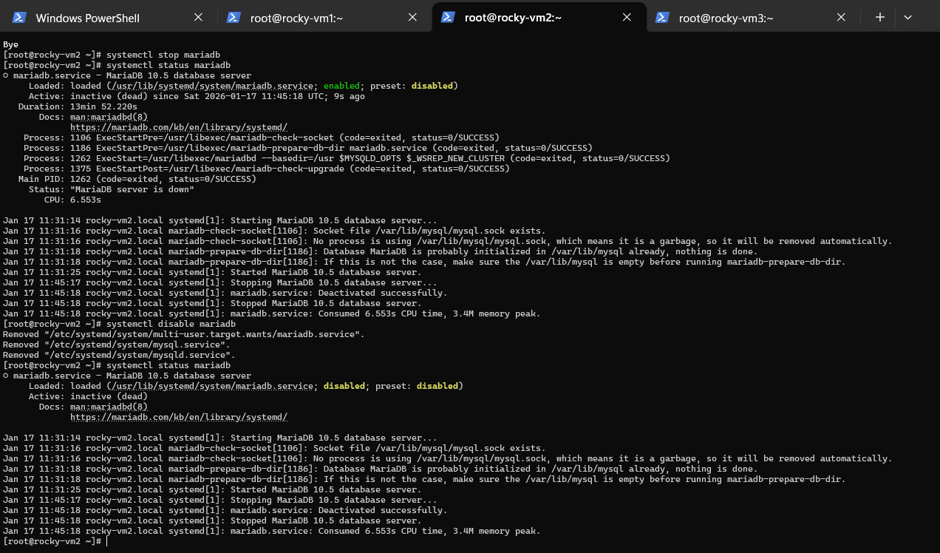
3.2 Backup Configuration Files
Preserve the current configuration before removing packages, as dnf remove may overwrite or delete config files.
mkdir -p /root/mariadb_backup
cp -a /etc/my.cnf.d  /root/mariadb_backup/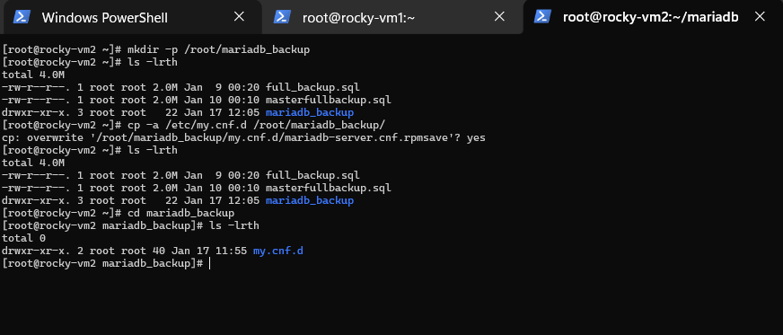
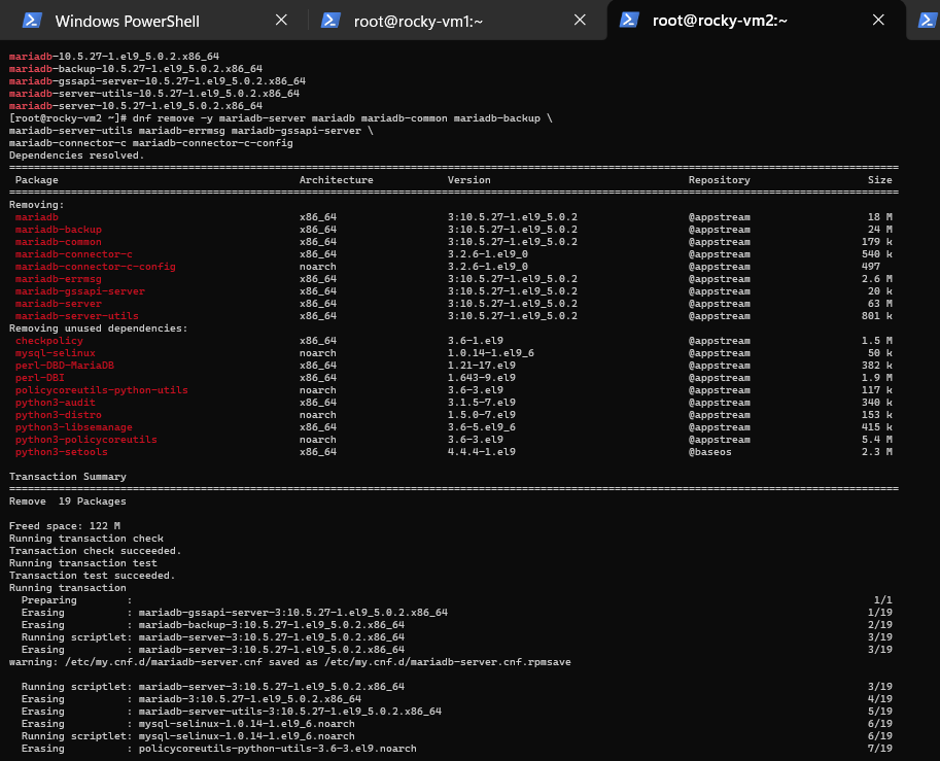
3.3 Remove Old MariaDB 10.5 Packages
Remove all 10.5 packages cleanly. The old repo file is also deleted to avoid version conflicts during install.
rm -f /etc/yum.repos.d/MariaDB.repo
dnf remove -y mariadb-server mariadb mariadb-common mariadb-backup \
mariadb-server-utils mariadb-errmsg mariadb-gssapi-server \
mariadb-connector-c mariadb-connector-c-config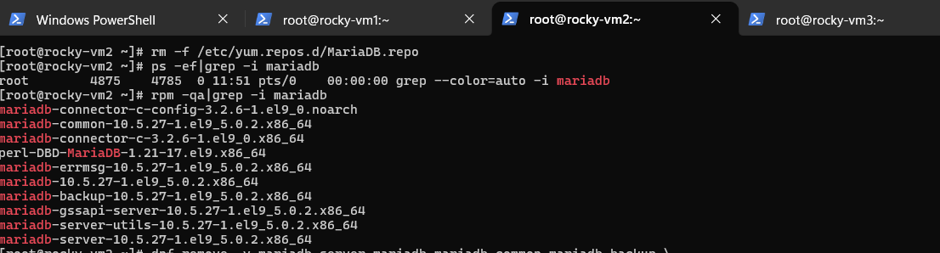
3.4 Configure MariaDB 11.4 Repository
Add the official MariaDB 11.4.4 repository for RHEL 9 / Rocky Linux 9:
curl -LsS https://downloads.mariadb.com/MariaDB/mariadb_repo_setup | \bash -s -- --mariadb-server-version=11.4.4 --os-type=rhel --os-version=9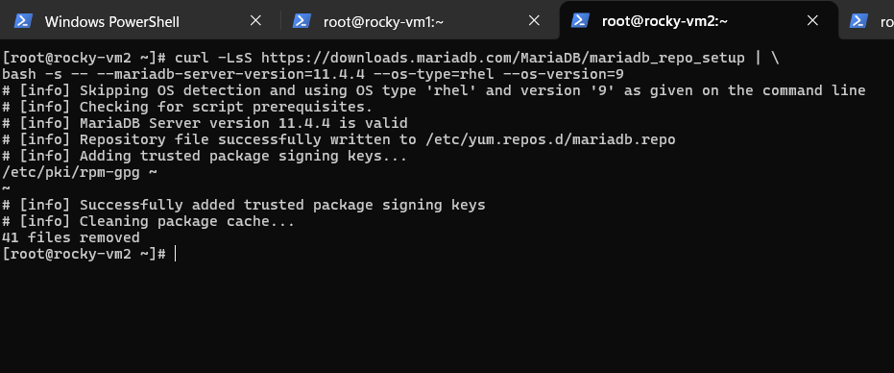
Verify the repository was added correctly:
dnf repolist | grep -i mariadb
dnf list available MariaDB-server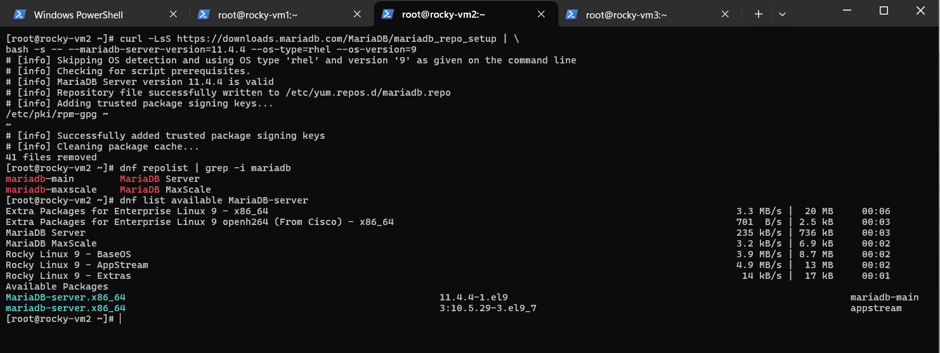
3.5 Install Missing Dependencies and Upgrade Packages
Install required OS-level dependencies first to avoid broken dependency errors during MariaDB install:
dnf install -y liburing perl-DBI
dnf clean all
dnf install -y MariaDB-server MariaDB-client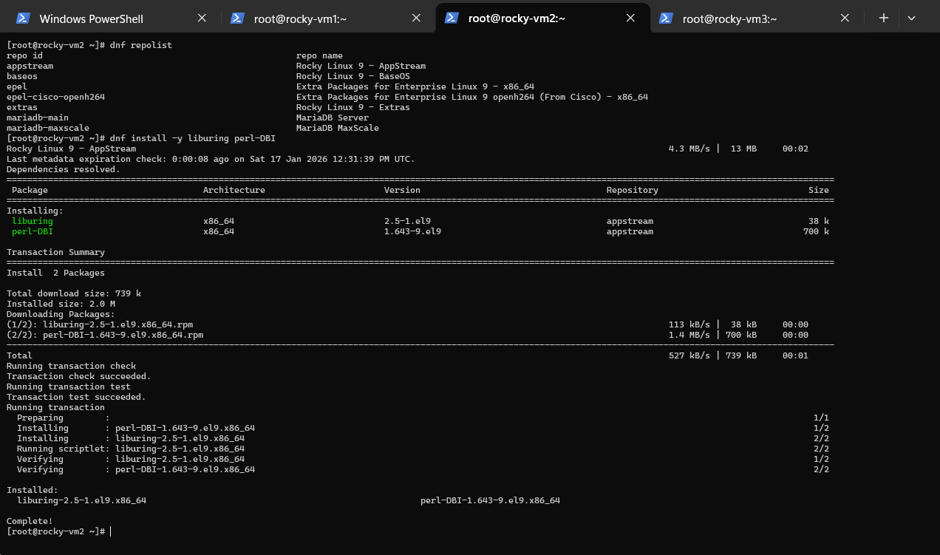
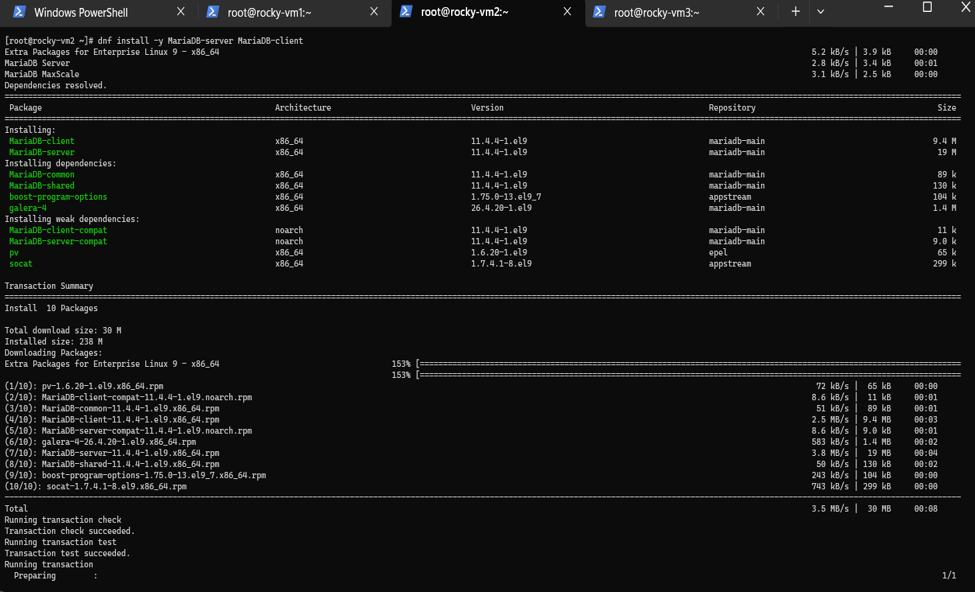
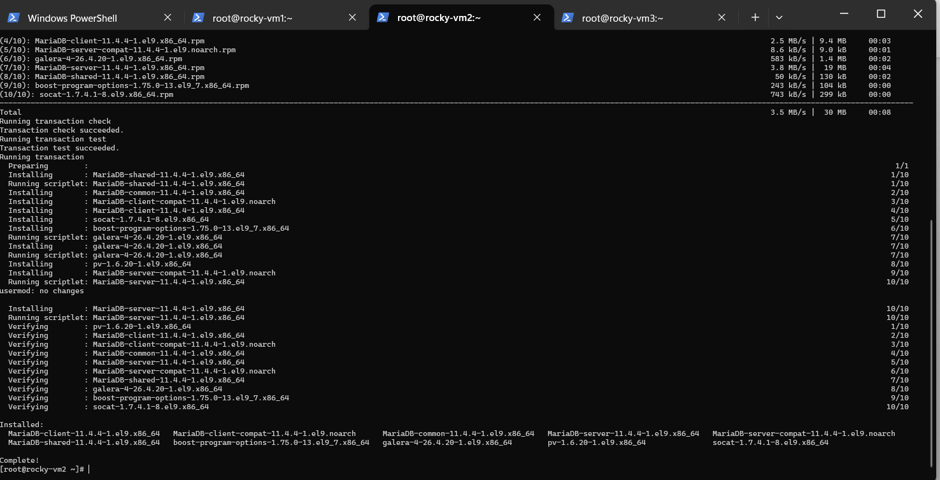

3.6 Start MariaDB and Run System Table Upgrade
After installation, start the service and immediately run the system table upgrade tools. Both commands must be run, they handle different internal schema migrations.
systemctl start mariadb
systemctl enable mariadb
systemctl status mariadb
mysql_upgrade      # upgrades grant tables and internal structures
mariadb-upgrade    # fixes mysql.event errors and internal table mismatches
systemctl restart mariadb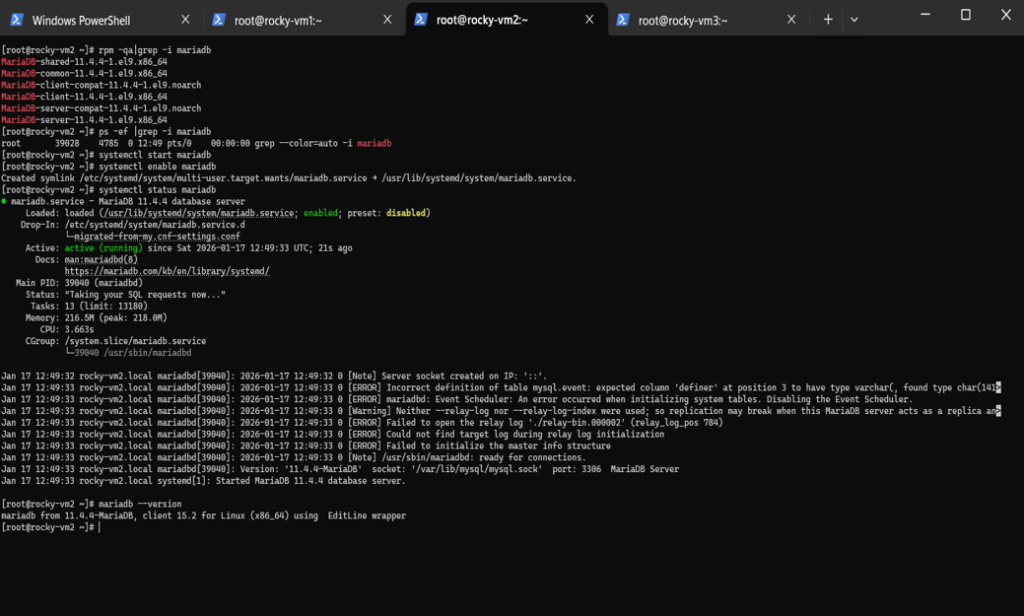
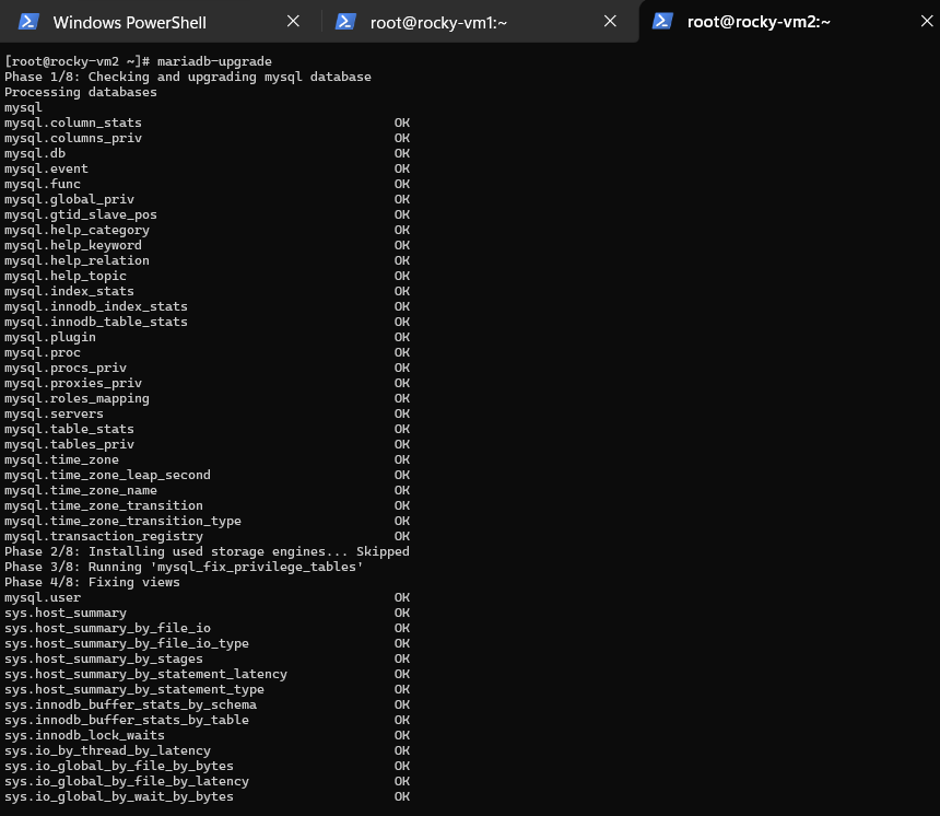
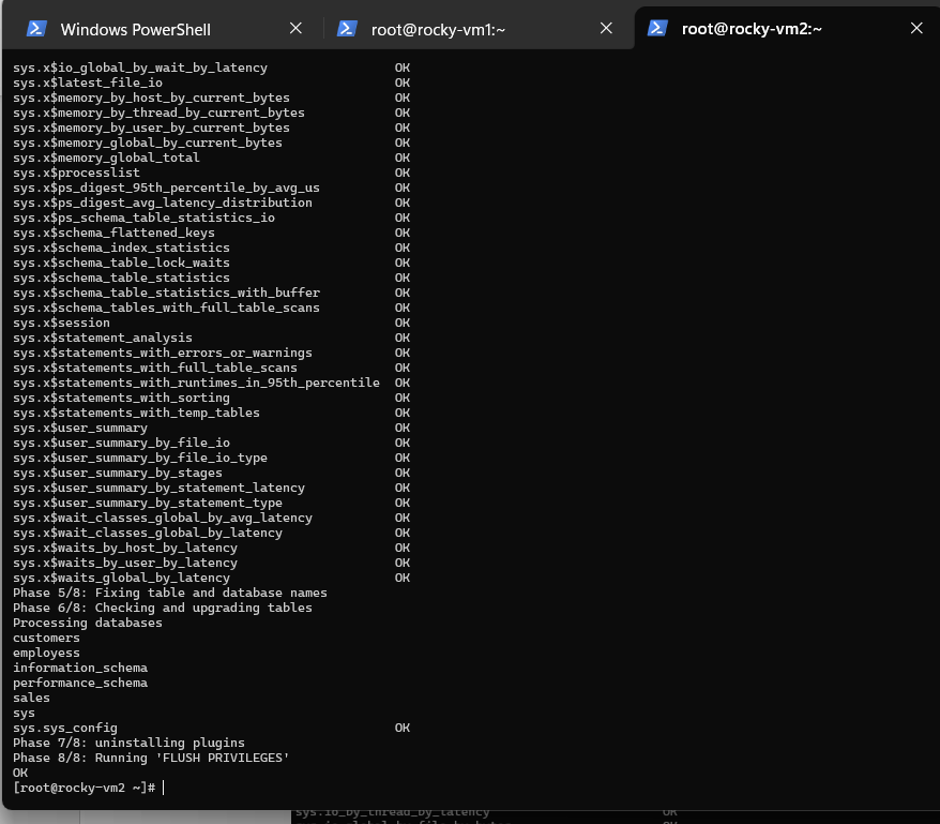
NOTE: Running mariadb-upgrade is mandatory. It resolves internal system table mismatches (including mysql.event errors) that arise from the major version jump. Skipping it may cause runtime errors or silent data issues.
3.7 Restore Configuration
After installation, the package manager may replace server.cnf. Restore from the saved .rpmsave backup:
cp -a /etc/my.cnf.d/server.cnf  /etc/my.cnf.d/server.cnf.bak
cp -a /etc/my.cnf.d/mariadb-server.cnf.rpmsave  /etc/my.cnf.d/server.cnf
3.8 Directory and Permission Checks
Verify required runtime directories exist with correct ownership. Create them if missing:
# Log directory
ls -ld /var/log/mariadb
mkdir -p /var/log/mariadb
chown mysql:mysql /var/log/mariadb
chmod 750 /var/log/mariadb
# Runtime (PID/socket) directory
ls -ld /run/mariadb
mkdir -p /run/mariadb
chown mysql:mysql /run/mariadb
chmod 755 /run/mariadb
# Data directory
ls -ld /var/lib/mysql3.9 Fix SELinux Context (Rocky Linux — Very Common Issue)
On Rocky Linux, SELinux frequently blocks MariaDB from accessing its directories after a package change. Restore the correct SELinux file contexts before starting the service:
getenforce                          # check if SELinux is enforcing
restorecon -Rv /run/mariadb
restorecon -Rv /var/lib/mysql
restorecon -Rv /var/log/mariadb
systemctl restart mariadb
systemctl status mariadb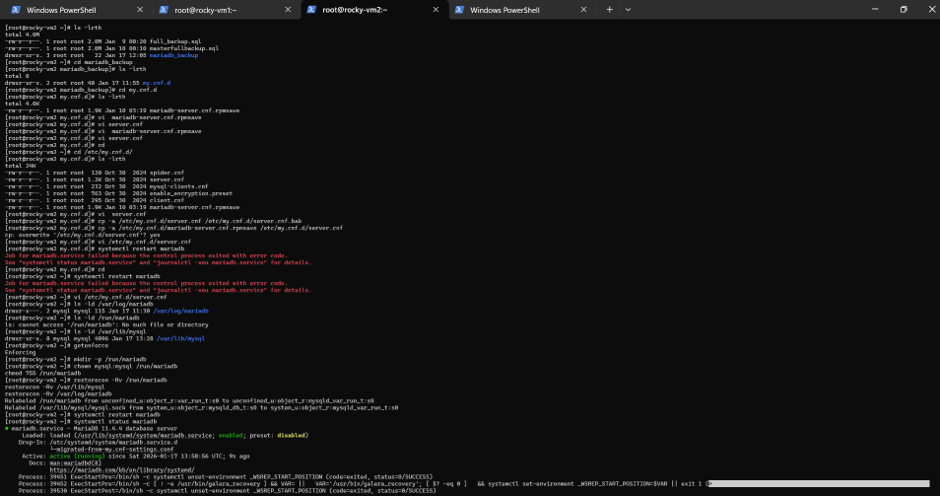
TIP: If MariaDB fails to start after installation and the service log shows permission denied errors, SELinux context is the most common cause on Rocky Linux 9.
3.10 Verify Version
SELECT VERSION();
SHOW VARIABLES LIKE 'version%';
SHOW DATABASES;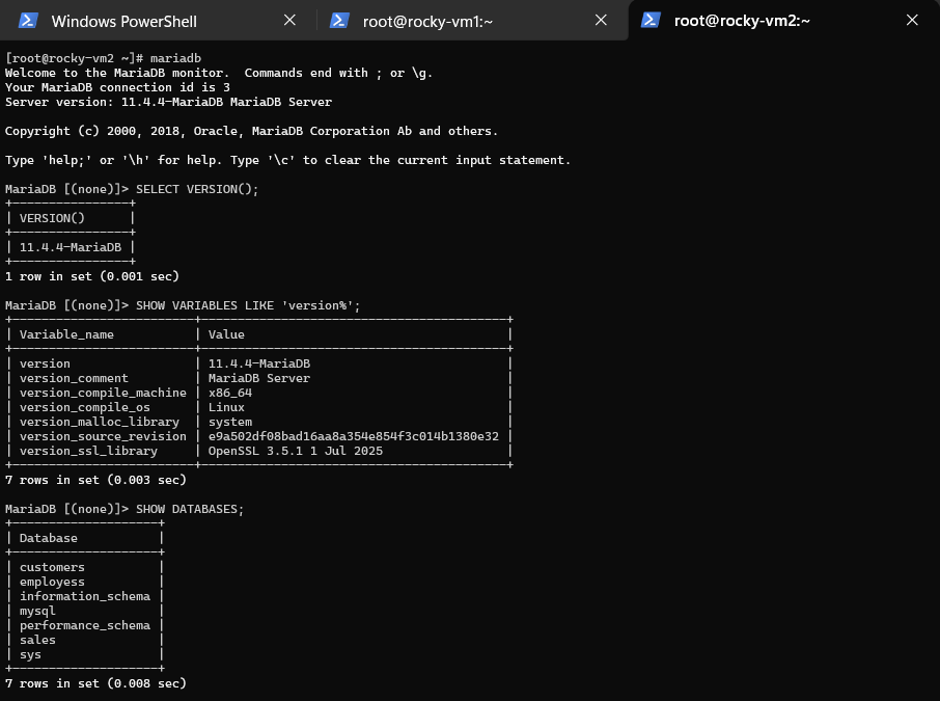
3.11 Reconfigure Replication on Slave
STOP SLAVE;

RESET SLAVE ALL;

CHANGE MASTER TO

  MASTER_HOST='192.168.56.21',

  MASTER_USER='repl_user',

  MASTER_PASSWORD='repl@123',

  MASTER_USE_GTID=slave_pos;

START SLAVE;
Reset the slave replication state and point it back to the Master using GTID positioning:
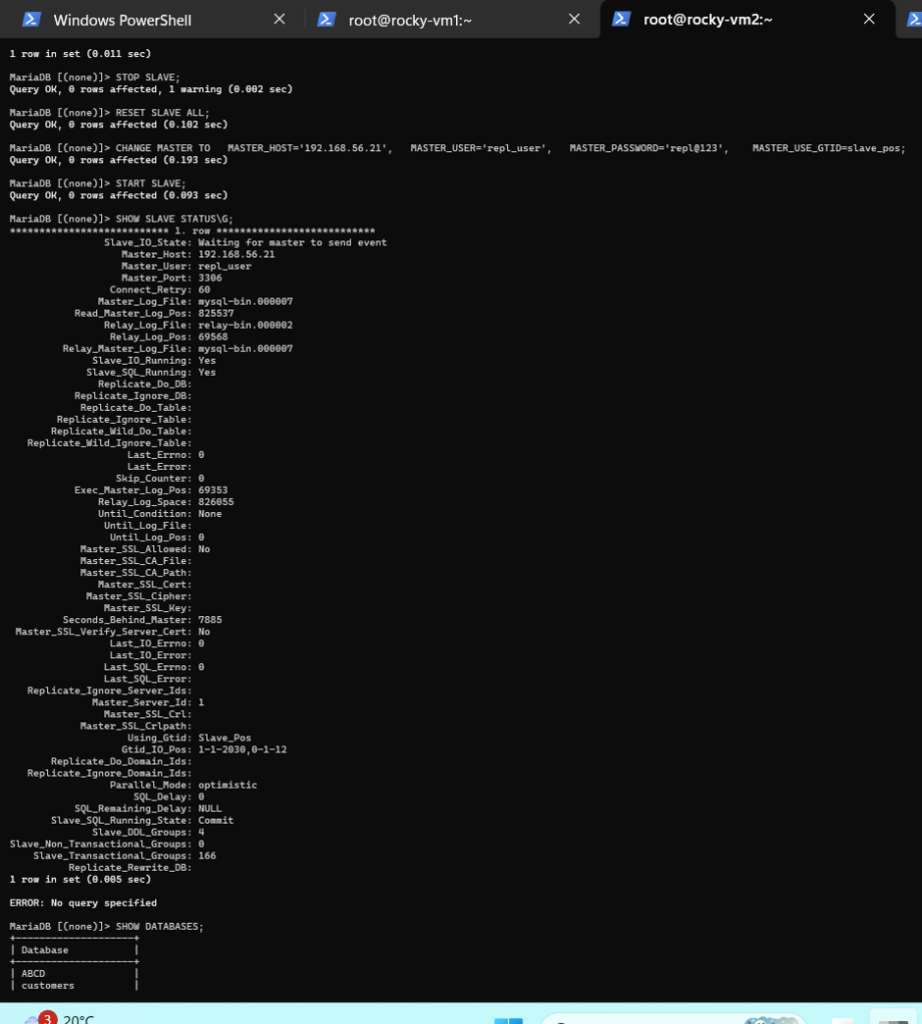
Step 4: Restore Slave to MaxScale Pool
Once replication is verified healthy, clear the maintenance flag so MaxScale resumes routing read traffic to server2.
maxctrl clear server server2 maintenance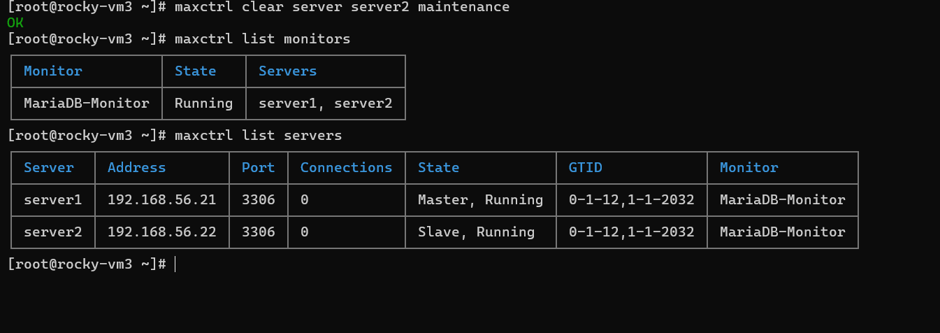
Step 5: Traffic Switchover (Promote Slave as Primary)
Before upgrading the Master, migrate all write traffic to the upgraded server 2. This eliminates downtime during the Master upgrade and validates the upgraded node under real workload.
Server2 is now the active Primary. All writes go to the upgraded node.
5.1 Put server1 in Maintenance
maxctrl set server server1 maintenance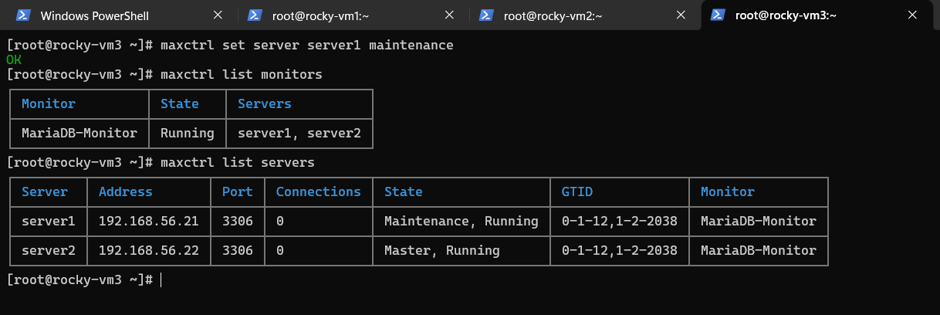
- Writes are now routed to server2 (upgraded)
- Server1 is isolated and safe to upgrade
- Near-zero downtime: switchover is handled gracefully by MaxScale
Step 6: Upgrade Master
The Master upgrade follows the same procedure as the Slave. Server 1 is now in maintenance mode, so no production traffic is affected.
6.1 Stop Service and Backup mariadb Config file
systemctl stop mariadb
mkdir -p /root/mariadb_backup
cp -a /etc/my.cnf  /root/mariadb_backup/    # if exists
cp -a /etc/my.cnf.d  /root/mariadb_backup/
6.2 Remove Old Packages and Add 11.4.4 Repository
Same steps as Step 3.3 and 3.4 — remove 10.5 packages, delete old repo, configure 11.4 repo, install dependencies, and install server packages.
rm -f /etc/yum.repos.d/MariaDB.repo
dnf remove -y mariadb-server mariadb mariadb-common mariadb-backup \
  mariadb-server-utils mariadb-errmsg mariadb-gssapi-server \
  mariadb-connector-c mariadb-connector-c-config

curl -LsS https://downloads.mariadb.com/MariaDB/mariadb_repo_setup | \
bash -s -- --mariadb-server-version=11.4.4 --os-type=rhel --os-version=9

dnf install -y liburing perl-DBI
dnf clean all
dnf install -y MariaDB-server MariaDB-client
6.3 Start, Upgrade System Tables, Restart
systemctl start mariadb
systemctl enable mariadb
mysql_upgrade
mariadb-upgrade
systemctl restart mariadb
systemctl status mariadb
6.4 Restore Config, Directory Permissions, SELinux
Apply the same config restore, directory ownership checks, and SELinux context fixes as in Step 3.7 – 3.9.
6.5 Reconfigure server1 as Replica of server2
At this point, server2 is the Primary. Configure server1 to replicate from server2:
STOP SLAVE;

CHANGE MASTER TO

  MASTER_HOST='192.168.56.22',

  MASTER_USER='maxscale',

  MASTER_PASSWORD='maxscale',

  MASTER_USE_GTID=slave_pos;

START SLAVE;

SHOW SLAVE STATUS\G;
6.6 Verify Version on server1
SELECT VERSION();
SHOW VARIABLES LIKE 'version%';
SHOW DATABASES;
Step 7: Promote server1 Back as Master
Both nodes are now running 11.4.4. Restore the original topology by switching writes back to server1 and re-establishing server2 as the Replica.
7.1 Clear Maintenance and Remove Promotion
maxctrl clear server mariadb-master maintenance7.2 Re-establish server2 as Replica of server1
STOP SLAVE;

RESET SLAVE ALL;

CHANGE MASTER TO

  MASTER_HOST='192.168.56.21',

  MASTER_USER='repl_user',

  MASTER_PASSWORD='repl@123',

  MASTER_USE_GTID=slave_pos;

START SLAVE;

SHOW SLAVE STATUS\G;
Step 8: Validation
Confirm the upgrade is complete, replication is consistent, GTID state is clean, and MaxScale reports all servers as healthy.
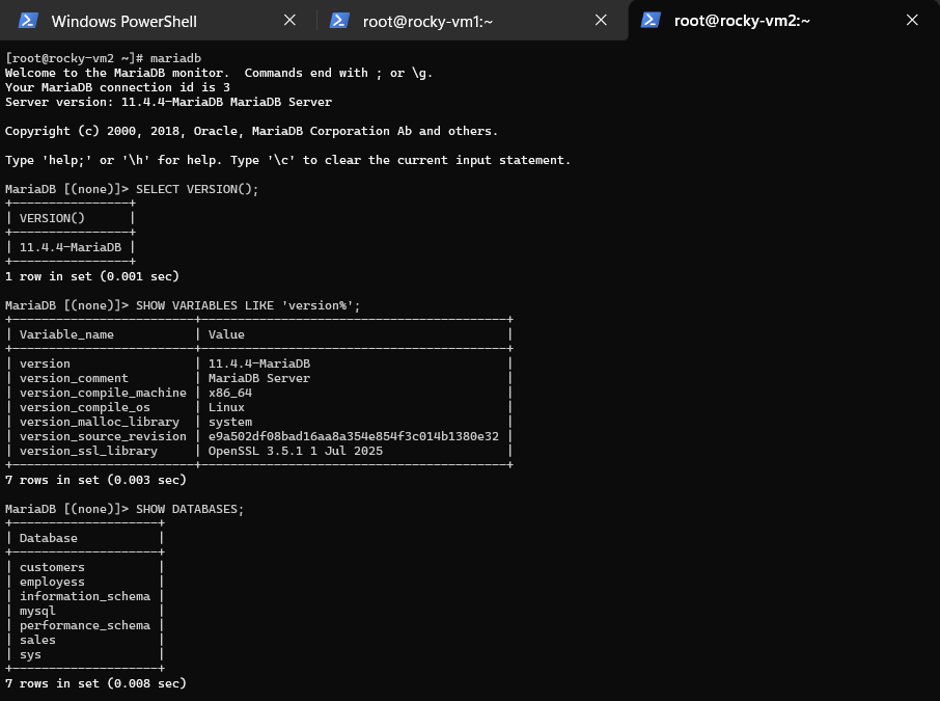
8.1 Version Check: Both Nodes
SELECT VERSION(); (or)

SHOW VARIABLES LIKE 'version%';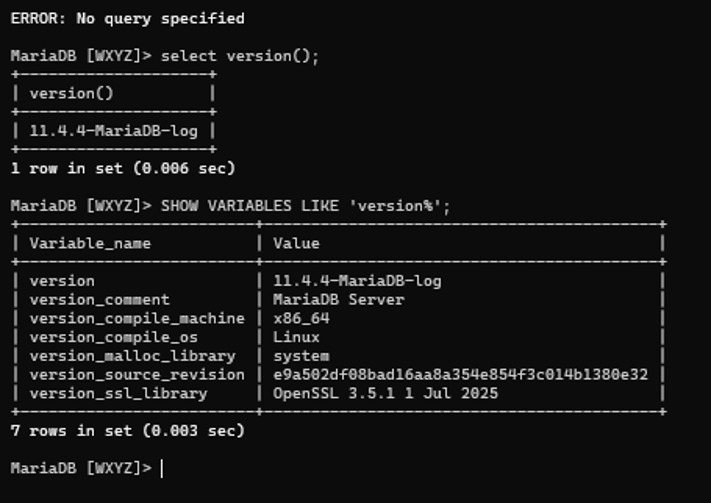
8.2 Replication Status: On Slave
SHOW SLAVE STATUS\G;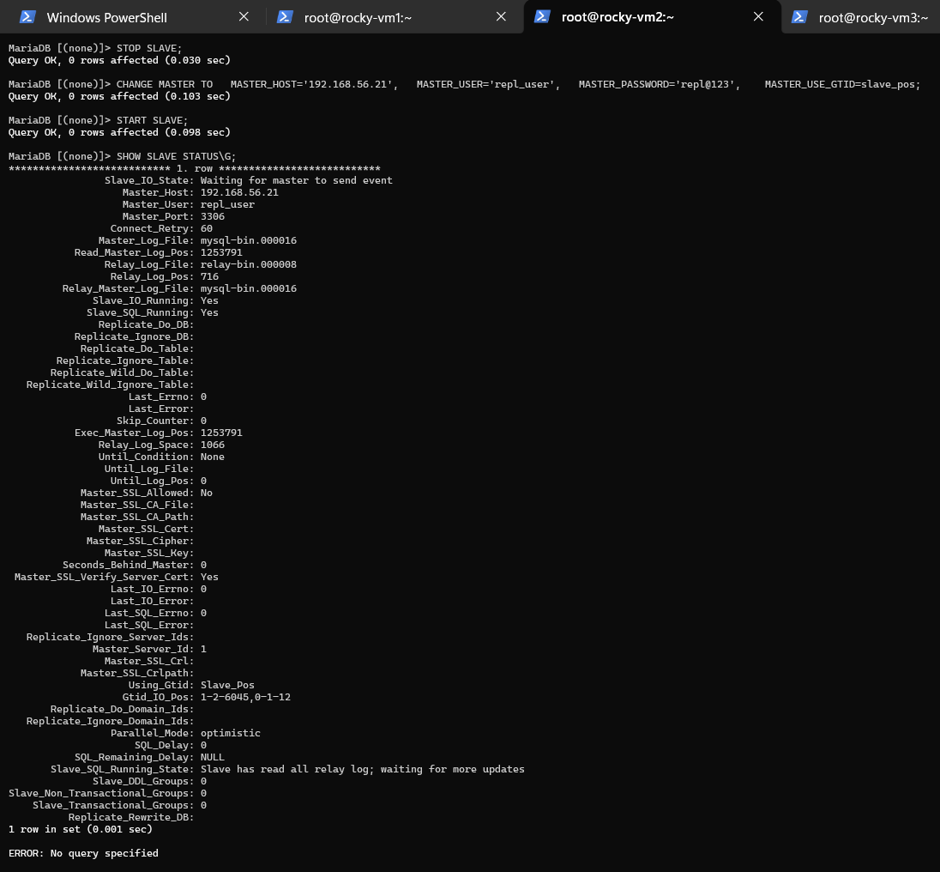
8.3 GTID State
SHOW GLOBAL VARIABLES LIKE 'gtid%';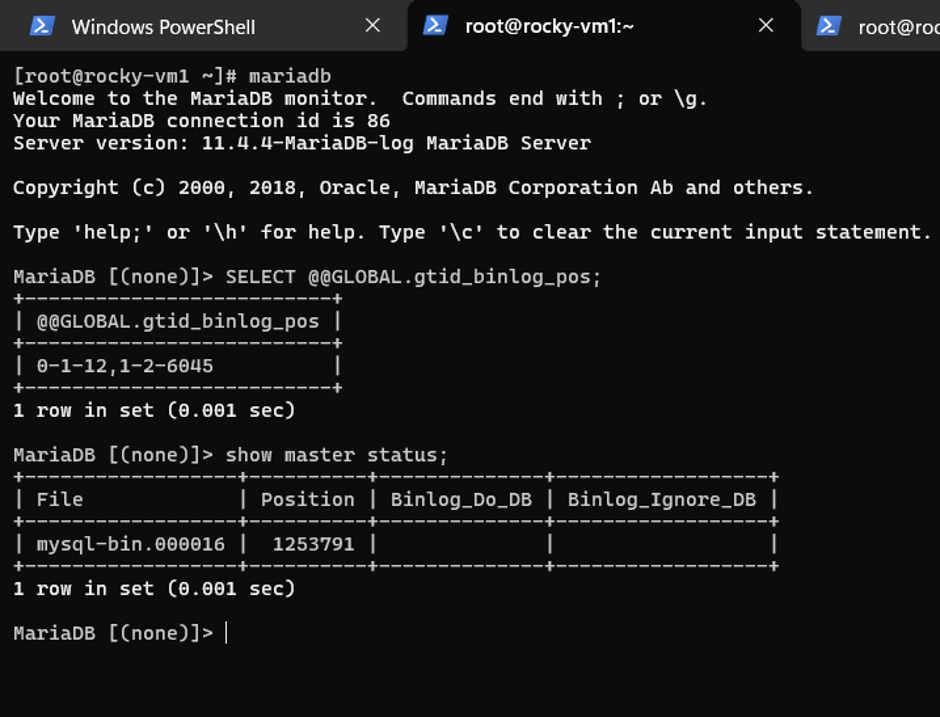
Confirm that gtid_current_pos and gtid_slave_pos are consistent between master and slave.
Create a table on the master and validate that it is reflected on the slave.
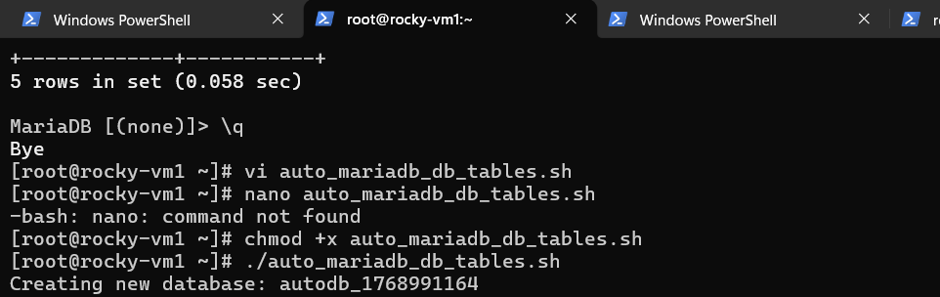
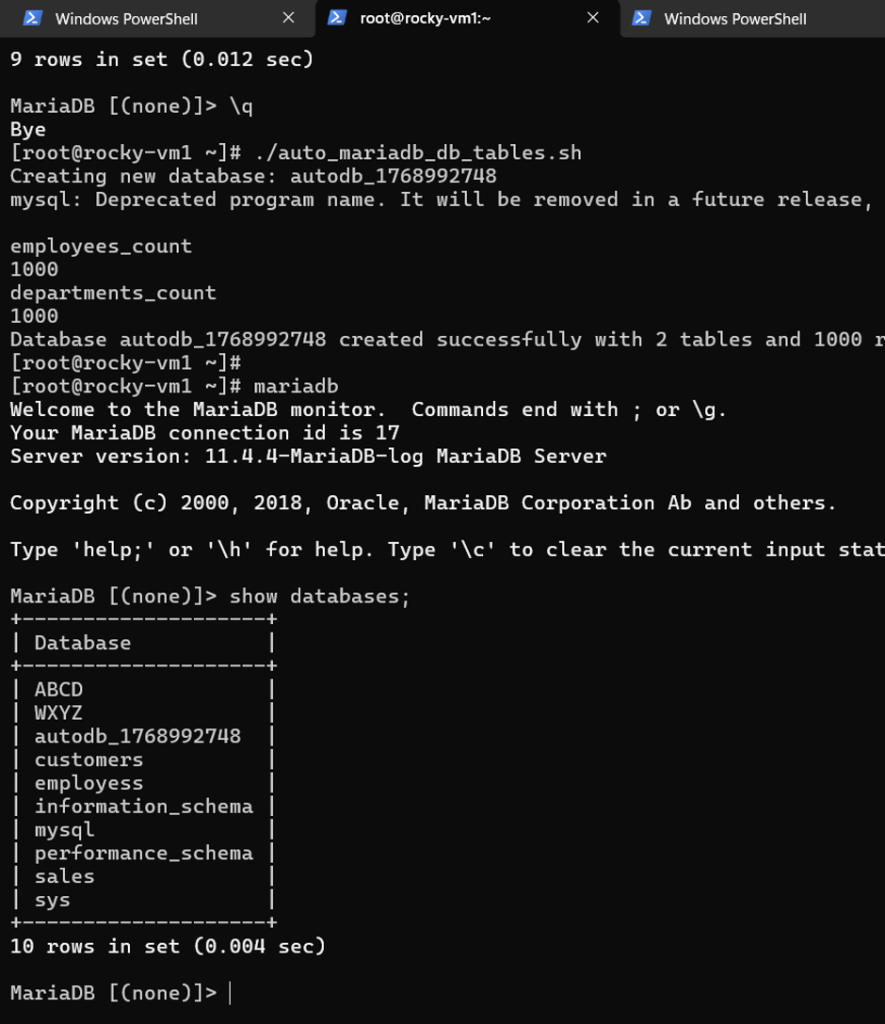
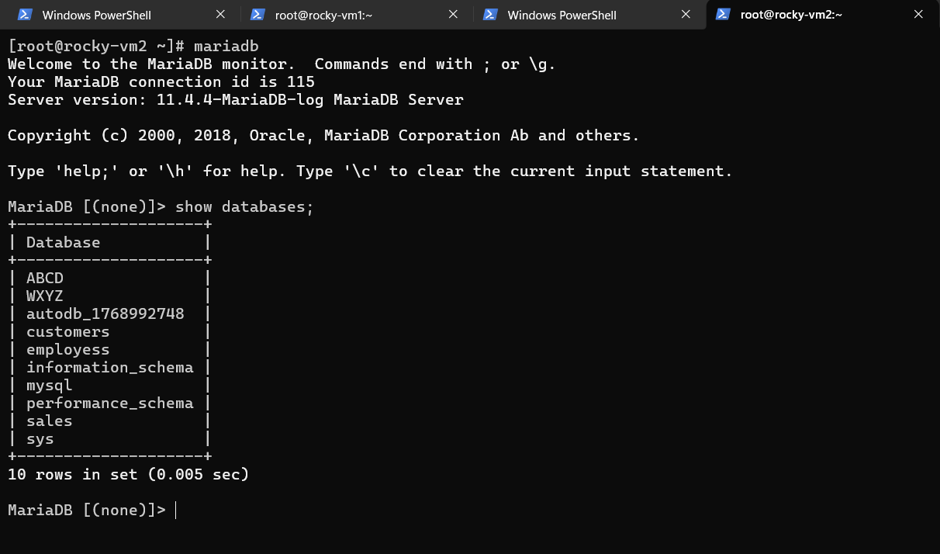
8.4 Check the MaxScale Server List shows the same GTID position
maxctrl list servers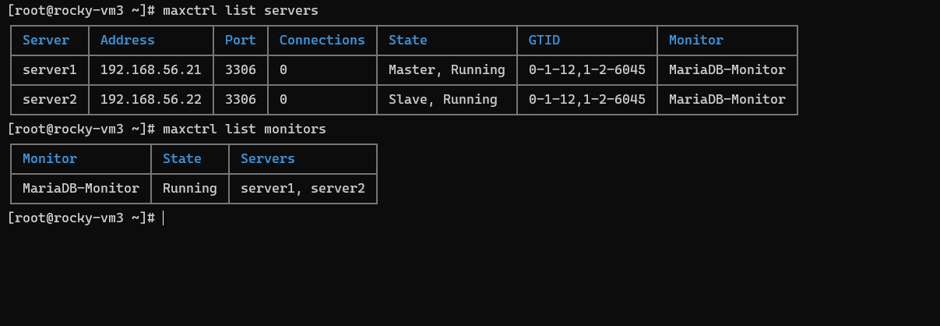
Both server1 and server2 should report a running status with the correct Master/Slave roles.
Things to Note :
MariaDB MaxScale was, before version 25.01, distributed under the Business Source License (BSL) 1.1. The BSL allows free usage of MaxScale with up to two MariaDB backend database servers. For deployments involving more than two backend servers, or for certain commercial uses restricted by the BSL, a commercial subscription from MariaDB plc is necessary. Code licensed under BSL typically converts to an open-source license (like GPL) after a defined period, usually three years.
As of January 16, 2025, MariaDB licensing was changed for MaxScale versions 25.01 and later from the Business Source License (BSL) to a fully proprietary commercial license. While the BSL version (which still applies to older versions like 24.02, 23.08, etc.) was “source-available” and eventually converted to GPL, the new license for 25.01 is closed-source and requires an active license MariaDB Enterprise subscription for production use. The license terms can be found here: MariaDB MaxScale License Terms (PDF).
Final Thoughts :
Upgrading MariaDB from 10.5 to 11.4 in a MaxScale high-availability environment successfully balances advanced database features with continuous application uptime. By utilizing MaxScale’s smart traffic routing and executing a phased, rolling upgrade across replication nodes, organizations can significantly minimize or eliminate service downtime. Ultimately, this strategic transition unlocks modern performance optimizations and long-term support capabilities while preserving the high availability and structural integrity of the database cluster.